
Skip the bullshit. Here’s what’s inside:
- Intro — Why This Game Broke Me (And Why I Love It)
- Pain Points — The Stuff That Will Make You Alt+F4
- First Steps — What to Do Before You See a Single Enemy
- Expert Tips — The Cheap Tricks I Wish I Had Day One
- Mistakes — How I Died 300 Times So You Don’t Have To
- FAQ — The Questions You’re Too Proud to Ask Reddit
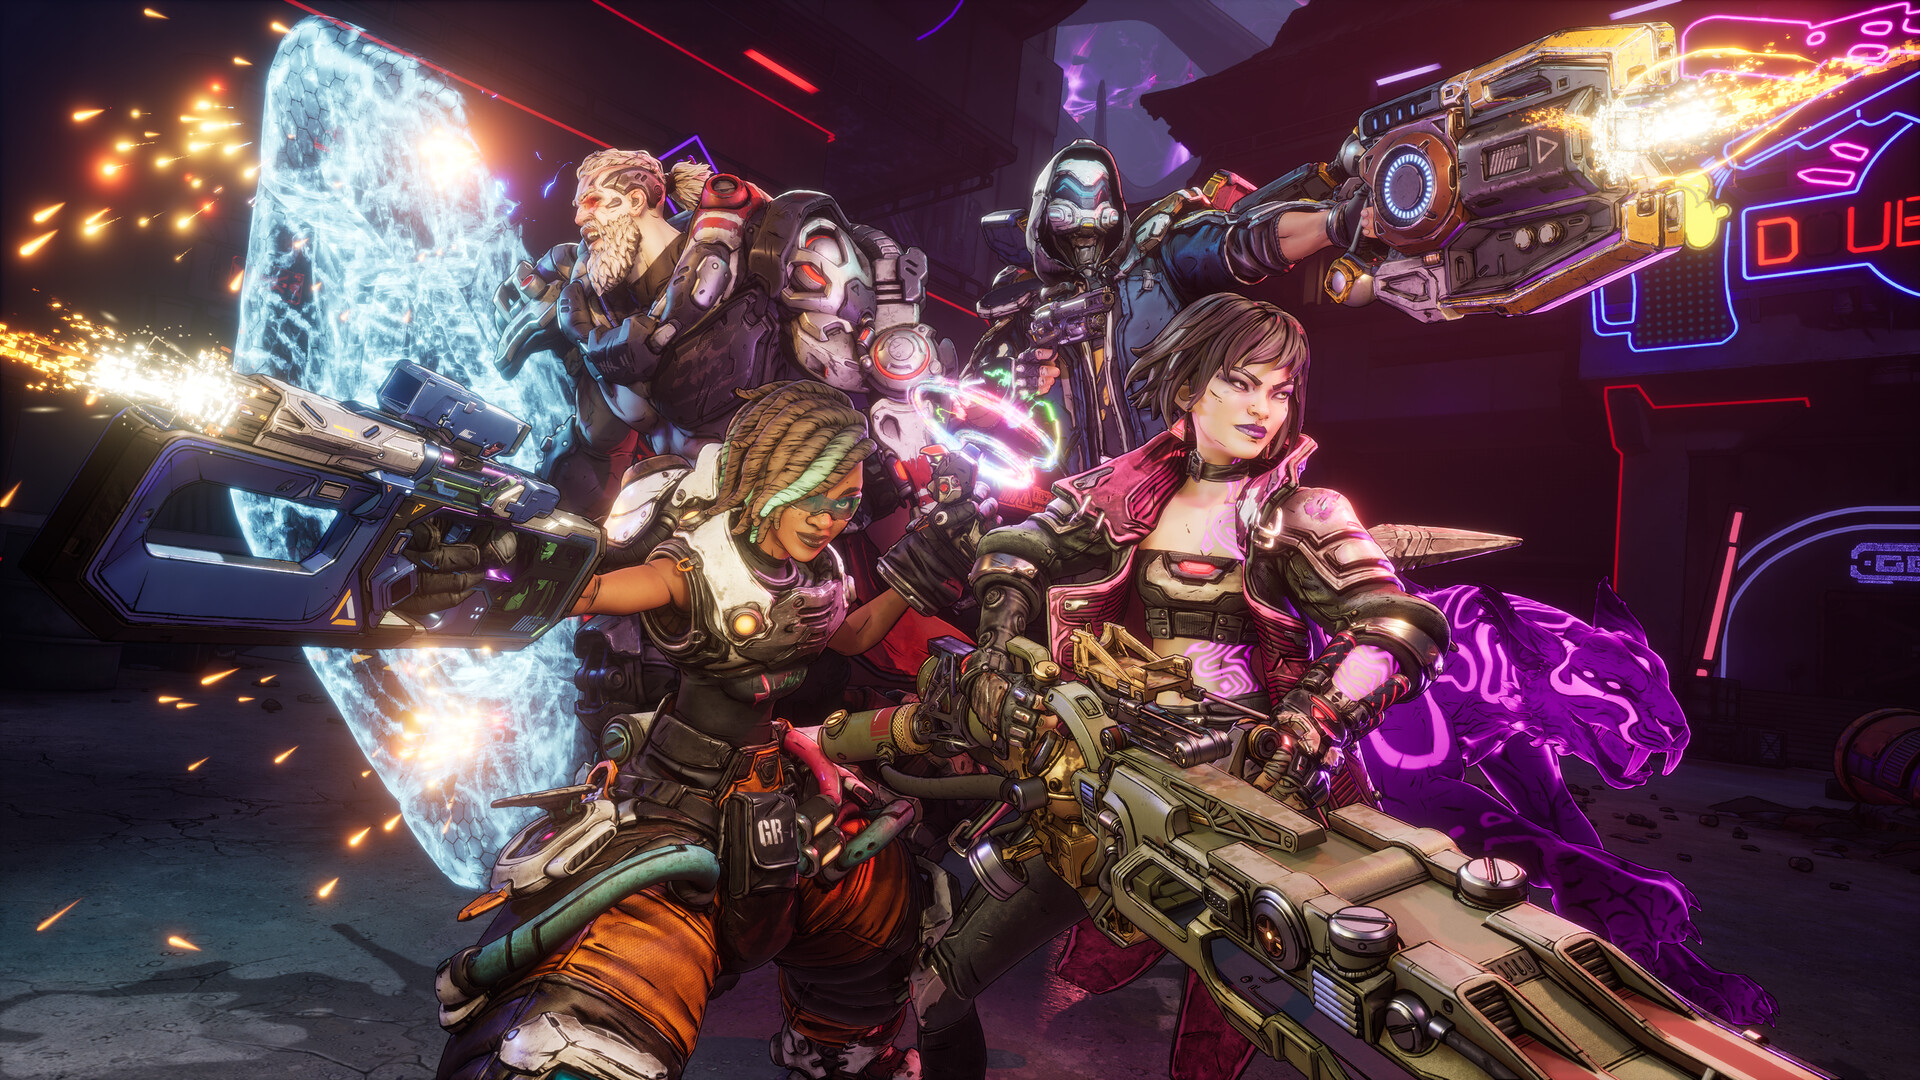
I Almost Quit After 10 Hours. Here’s Why I’m Still Playing.
Let me paint you a picture. I’m forty hours into Borderlands 4, sitting on my couch at 2 AM, my fingers stained with Cheeto dust, and I’ve just died to the same generic badass enemy for the seventh time in a row. I’m not even fighting a boss. I’m fighting a trash mob that spawned behind a rock. My girlfriend walks in, sees my face, and asks if I’m okay. I wasn’t. I was getting my ass handed to me by a game I was supposed to be good at.
That’s the thing about Borderlands 4. It looks like more Borderlands. It feels like more Borderlands. And then it pulls out a shotgun, sticks it in your ribs, and takes your lunch money. This game doesn’t respect your time if you don’t respect its mechanics. The learning curve is a cliff face, and I spent my first ten hours trying to climb it with buttered gloves.
I remember my first run. I picked the Raider class because big gun go brrr. I thought I was hot shit. I stacked every piece of gear that said “+5% elemental damage” without reading the fine print. I hit the second “real” boss — the one in the abandoned digistruct facility — and he deleted me in three hits. I tried again. Same result. I tried a different gun. Same result. I respecced my entire skill tree. Still dead. It took me three hours and a complete rebuild before I realized the boss punishes you for standing still longer than two seconds. The game doesn’t tell you this. It just kills you until you figure it out.
So yeah, I wrote this guide because I remember what that feels like. I want you to skip the three hours of staring at a loading screen wondering what you did wrong. This is the stuff the tutorial doesn’t say. This is the real shit.
Why You’re Getting Wrecked (And Why It’s Not Your Fault)
Borderlands 4 has a problem. Actually, it has several problems, and they all conspire to make you feel like a moron. Let’s name them.
The Gear Score Lie. You know that number next to every gun? The one that says “Item Score 420” or whatever? It’s a trap. A level 20 white-rarity pistol with a specific barrel attachment will out-damage a level 25 purple-rarity SMG if the elemental modifiers match the enemy type. The game does not explain this. It just shows you a bigger number and says “this is better.” It’s not better. It’s a trap. I spent my first five levels swapping to strictly higher-score weapons and wondering why my bullets tickled enemies. Stop doing that. Read the card. Look at the damage per shot, the fire rate, and the element. The number is a suggestion from a bad game designer.
The Elemental Rock-Paper-Scissors That Isn’t Taught. Borderlands 4 added a fourth element: Radiation. It’s strong against shields and has a secondary effect that chains damage to nearby enemies. Sounds great, right? Wrong. If you go into the first major area — the one with all the armored bandits — and you’re carrying a Radiation weapon, you are effectively shooting them with a water pistol. Armored enemies resist Radiation. The game tells you this in a loading screen tip you will never read because you’re too busy getting shot. You need Corrosive for armor, Shock for shields, Fire for flesh. Radiation is a wildcard you use for crowd control, not for your main DPS. Learn this. Memorize it. I didn’t, and I spent my first six hours doing zero damage.
The Slide Mechanic Is Not Optional. There’s a button that makes you slide. Use it. Constantly. The movement speed in this game is slower than Borderlands 2. If you’re walking, you’re a target. If you’re sprinting, you’re a slightly faster target. If you’re sliding, you’re a slippery, hard-to-hit greased pig. Every single enemy in this game has been programmed to lead their shots. They predict where you’ll be in 0.5 seconds. A slide breaks that prediction. I went from dying every three minutes to surviving entire encounters just by sliding between cover. It’s that big of a difference.
The Badass Rank System Is a Time Sink. You know that guardian rank thing from BL3? It’s back. It’s called “Badass Rank” again. You earn tokens by completing challenges. Those tokens give you tiny, almost imperceptible stat boosts. Here’s the problem: the challenges are grindy as hell. “Kill 250 enemies with a launcher.” Nobody has time for that. You will burn out trying to max this. Don’t. Just let it happen naturally. The stat boosts are too small to matter in the early game. Focus on gear and skill trees. The Badass Rank is a carrot on a stick for sadists.
Your First Three Hours: What You Actually Need to Do
So you’ve loaded the game. You’ve picked a class. You’ve watched the two-minute opening cutscene. Now what? Let’s break it down in order, from moment one.
Step 1: Bind Your Slide Key to Something You Can Spam. I don’t care if it’s Left Shift, CTRL, or Mouse Button 4. Put it somewhere your finger lives. I use CTRL because I’m old school. You should be sliding more than you’re sprinting. Do this before you leave the first room. It will save your life.
Step 2: Do Not Sell Every Gun. The game gives you a backpack full of loot. You’ll be tempted to sell everything that isn’t your current best weapon. Don’t. Keep one of each element type in your inventory. You can’t know what you’ll face in the next area, and running back to a vendor because you’re fighting armor with fire guns is a death sentence. I keep at least two slots empty for loot, and the other four are filled with one Corrosive, one Shock, one Fire, and one high-damage Kinetic (non-elemental) gun for general use.
Step 3: The First Mini-Boss Is a Filter. About 20 minutes in, you’ll fight a named enemy called Foreman Kael in a garage. He has a huge health bar and two waves of adds. You will die here if you don’t understand cover. There is a metal beam on the left side of the room. Stand behind it. Shoot Kael when he’s not looking at you. When he throws his explosive attack, slide to the right side of the room and take cover behind the stack of crates. Do this dance for three minutes and he’s dead. If you stand in the middle of the room and try to out-DPS him, you will respawn. I know, because I did it four times.
Step 4: Spend Your First Points in Survival, Not Damage. I know it’s tempting to put every skill point into “+15% gun damage.” Do not. In the first tier of every class, there is a skill that gives you health regeneration or a damage reduction. Take that first. I play Operative, and I put my first point into “Field Medicine” — which heals 4% of my max health every time I activate my action skill. That 4% keeps me alive in fights where I’d otherwise be bleeding out. Every class has something like this. Find it. Take it. You can respec later for big damage numbers when you actually know how to stay alive.
Step 5: Ignore the Slab Side Quests Until Level 12. The first major hub has a bounty board. It offers side quests called “Slab Contracts.” They look tempting because they give good XP and a blue-rarity gun at the end. They are scaled to the zone level, not your level. If you grab them at level 6 and head to the marked location, you will fight level 12 enemies. They will one-shot you. I spent an hour trying to clear a Slab Contract at level 8 before I realized I was fighting guys with triple my health. Wait until you’re the same level or higher. The game doesn’t warn you.
The Tricks the Streamers Don’t Show You
Okay, you’ve got the basics. You’re not dying every five seconds. Now let’s talk about the shit that actually makes you powerful. These are the tips I’ve learned from 200+ hours of blood, sweat, and respawns.
PRO TIP: The “Second Wind” Abuse
You know how you go into “Fight For Your Life” mode when you take fatal damage? You can trigger a Second Wind by killing any enemy, not just the one that downed you. The game’s tutorial implies you need to kill the guy who shot you. That’s a lie. If you’re crawling on the ground and there’s a low-health enemy across the map, shoot him. Doesn’t matter if he’s a tiny spiderant. If he dies, you stand up. I’ve survived fights where I was downed six times in a row by switching to a high-pellet-count shotgun and praying for a single kill on a trash mob. Keep a weak pistol in your inventory for this exact reason — you want one gun that puts out high fire volume to finish off low-health enemies when you’re on the ground.
The Mag Size Meta. Everyone talks about damage per shot. Nobody talks about mag size. In Borderlands 4, reloading gets you killed. The animation is long, and enemies love to charge you while you’re fumbling with a fresh mag. Prioritize weapons with high magazine capacity over weapons with slightly more damage. A 45-round assault rifle that does 80 damage per shot is better than a 20-round rifle that does 100 damage per shot, because you can fire for twice as long before you’re vulnerable. I use a blue-rarity Vladof assault rifle with a 62-round drum mag. It carried me through two whole areas. Reload speed is the true DPS killer.
The Jump-Pad Cancellation Trick. There are jump pads scattered around the maps. They launch you high in the air. The default behavior is you come down and land hard. But if you melee attack right before you hit the ground, you cancel the landing animation and can immediately sprint or slide. This saves you about 0.8 seconds per pad. Across a whole zone, that’s minutes shaved off your travel time. More importantly, it keeps your momentum up during fights. I use this in the Foundry area to dodge the giant sawblade attacks. It looks stupid, but it works.
The Grenade You Should Be Farming. There’s a specific grenade mod called the “MIRV Homing” that drops from a mini-boss named Strickler in the Salt Flats. It spawns six child grenades that each home in on enemies. This grenade is so good it makes most boss fights trivial. The damage isn’t insane — about 340 base damage per grenade at level 15 — but it staggers enemies constantly. Stagger is massively undervalued. Every time an enemy stops to flinch from a grenade, they’re not shooting you. Go farm this grenade for 30 minutes. It’s worth the boring farm.
The “Invisible Wall” Exploit for Badass Enemies. Badass enemies are the big yellow-bar dudes that everyone hates. They have huge health pools and strong attacks. Here’s the trick: most of them can’t fit through doorways. If you stand in a narrow doorway, they will stand on the other side and try to shoot you. They won’t walk in. You can shoot their head while they stand there like an idiot. This works in at least five different zones. The Bloodshot Ramparts area has a doorway right after the first bridge. I killed a Badass Incinerator with zero health damage by standing in that doorway and shooting him in the face for 45 seconds. It’s not elegant. It’s not honorable. But it works.
The Five Mistakes I Keep Seeing (And Made Myself)
1. Saving Your Action Skill For “The Right Moment.” Your action skill has a cooldown. Use it. Use it again. Use it on cooldown. There is no “right moment” except “when there’s an enemy in front of you.” I see so many newbies hoarding their action skill like it’s a potion in a JRPG. Pop it the second you enter a fight. It will be back in 30 seconds. The cooldown is shorter than you think. I wasted the first ten hours of my Operative playthrough barely using my clone because I was “saving it for a boss.” That’s dumb. Use it.
2. Not Using The Map Ping. Borderlands 4 has a ping system. You can ping enemies, items, locations. It marks them on your HUD and your teammates’ HUD. I played solo for 30 levels and forgot this existed. Then I played co-op and my friend kept pinging the ammo crates I was ignoring. It changed my life. In solo, ping a badass enemy to keep track of him while you’re dealing with adds. In co-op, ping the legendary drop so your idiot teammate doesn’t run past it. This is the single most underused feature in the game.
3. Standing Still To Aim Down Sights. Hip-fire is your friend. The accuracy penalty for hip-firing in this game is almost non-existent at close to medium range. If you ADS, you slow down. If you slow down, you die. I only ADS for long-range sniping or when I need to hit a crit spot on a heavy enemy. The rest of the time, I’m hip-firing while sliding. Your damage numbers will be lower, but your survival rate will be way higher. Dead players do zero DPS.
4. Ignoring The Environment Hazard Indicators. There are green pipes, red barrels, and blue electrical panels scattered everywhere. They explode. They deal elemental damage. The game has a HUD indicator that tells you when you’re near one — it’s a small icon that looks like a fire or a lightning bolt. I ignored this icon for 20 hours. Then I blew myself up twice in the same room because I was standing next to a car that was about to explode. Watch your minimap. If you see the hazard icon, move. It takes half a second to check.
5. Trying To Clear Every Single Side Quest Before The Main Story. There are a lot of side quests. They give good XP. They give good loot. They also waste your time. The main story areas scale to your level. If you spend 15 hours doing every side quest in the first zone, you will be level 20 when you enter the second story zone. Everything there will be scaled to level 18-20. You’ll have no challenge and the loot will be underleveled when you hit the mid-game. I did this in my first playthrough. I was level 22 at a level-15 story mission. The guns I got there were garbage by the time I hit the next zone. Do the main story until you hit a wall. Then do side quests as needed. Don’t over-level yourself into boring content. There’s a similar pacing problem in Elden Ring — check out our Elden Ring beginner guide for tips on handling open-world level scaling.
Frequently Asked Dumb Questions (That Are Actually Smart)
Q: Is there a “best” class? Should I restart if I picked the wrong one?
A: No. All four classes can beat the game on Normal mode. The Raider is the easiest for beginners because his action skill is a big damage buff with no management. The Operative is the hardest because you have to manage your clone placement and cooldowns. But there’s no wrong choice. I’ve seen a level 50 Operative solo a raid boss. It’s about how you build, not who you pick.
Q: What does “Mayhem Mode” actually do? Should I turn it on?
A: Don’t touch Mayhem Mode until you finish the main story. It’s a set of difficulty modifiers that increase loot quality but also increase enemy health and damage by crazy amounts. Mayhem 1 doubles enemy health. Mayhem 10 multiplies it by 15. You are not ready. I tried Mayhem 2 at level 30 and a skag sneezed on me and I died. Finish the story first.
Q: How do I respec my skill points?
A: Inside any Quick Change Station (the vending machines that let you change your appearance). There’s one in every safe room. It costs $500 for the first respec, then scales based on your level. You can respec infinitely. Do it whenever you want to try a new build. Don’t suffer with a bad build because you’re afraid of the cost. $500 is nothing. You can sell one white gun and buy a respec.
Q: Why do I keep getting one-shot by sniper enemies?
A: Sniper enemies have a red laser sight before they shoot. You can see it on the wall or floor. If you see a red dot, slide perpendicular to it. Do not stop moving. The shot is telegraphed by about 1.5 seconds. That’s enough time to get out of the line of fire. I died to the same sniper on a rooftop in The Breach six times before I figured out I was just standing still and strafing left. Slide right, not left.
Q: How do I unlock the third weapon slot?
A: Complete the story mission “The Armory at Dawn” around level 15. You get the third slot as a reward. The fourth slot comes from the mission “Cradle of the Machine” around level 25. Don’t stress about having only two slots early on. It forces you to make hard choices about what guns to carry, which is a good learning experience.
Q: Is the vehicle necessary? I hate driving.
A: You can walk everywhere. It will take you three to five times longer. The maps are massive. The vehicle is not optional if you want to finish the game in under 60 hours. The cars handle like wet soap on ice. Get used to it. There’s a trick: when you’re driving and you hit a bump, tap the handbrake (spacebar on PC, circle on controller) to stabilize the car. It prevents the spinning-out animation. I learned this from a random forum post. It’s the only reason I don’t hate the driving.
Q: How do I get a legendary gun to drop?
A: Legendaries drop from any enemy, but the best way to farm them is to kill named enemies — the ones with a skull icon on the minimap. They have a ~15% chance to drop their dedicated legendary. If you want a specific gun, look up which boss drops it, then kill that boss, save-quit, reload, and kill them again. This is called “farming.” It’s boring. It’s how you get the good stuff. I spent two hours farming Strickler for that MIRV grenade I mentioned. It was worth it. If you’re into the grind mentality, you might also like our Diablo 4 guide — the loot chase is very similar.
Q: The game crashed. Is my save file gone?
A: Borderlands 4 auto-saves constantly. Your save is fine. The game has a memory leak issue on PC that causes crashes in long sessions. Set your graphics texture quality to High instead of Ultra. This fixes 90% of the crashes. I had crashes every two hours until I did this. Now I crash once a week.
💬 Comments
What players are saying:
Okay, the tip about farming the MIRV grenade from Strickler saved my sanity. I was stuck on the Foundry boss for an hour. Got the grenade, staggered him twice, fight was over in 90 seconds. This guide is the only one that actually tells you WHERE to get the good stuff instead of saying 'equip better gear.' +1 for the slide binding advice, that’s the real game-changer.
I gotta slightly disagree on the 'use your action skill on cooldown' advice. As an Operative main, if you pop your clone at a bad time, it dies instantly and your cooldown is wasted. I save mine for when I'm about to get mobbed or need a rez. Otherwise solid advice, especially the part about hip-firing. I ADS'd for the first 30 levels and kept wondering why I couldn't dodge rockets. Feel like an idiot, but this guide made me realize it.
Bro, the 'invisible wall' exploit in the Bloodshot Ramparts is hilarious. I literally just beat a Badass Incinerator without taking a single point of health damage. I was laughing so hard my wife asked what was wrong. This guide is the real deal. Also, the warning about Slab Contracts saved me from a rage quit. Thanks for not writing like a corporate bot.
Sign in to post a comment.
Sign in with GitHub to join the discussion.