Skip to a section:
Introduction — My Honest Take
Alright, listen. Deep Rock Galactic is the best co-op shooter I’ve played in a decade, and I’ve got over 800 hours in it. But I’m not gonna sit here and tell you it’s all rainbows and beer mugs. When I first started, I got absolutely smashed. Not by bugs — by the game itself. I spent my first five missions running in circles, lost in caves that looked the same, running out of ammo, and watching my teammates type "gg" while I bled out on the floor. It’s brutal, confusing, and the tutorial barely teaches you how to break a rock. But if you push through that initial wall? Man, there’s nothing like it. This guide is the stuff I wish someone had shouted at me through Discord during those first miserable hours.
The game throws you into procedurally generated caves on a planet called Hoxxes, you play as a dwarf with a specific class, and you mine minerals, fight alien bugs (Glyphids, we call 'em), and get out alive. Simple premise, but the execution is where it gets hairy. The game doesn't hold your hand. It expects you to figure out that the MULE (the big robot that carries your stuff) has a mind of its own, that friendly fire is on, and that the drop pod will absolutely leave without you. I’ve been left behind. It’s embarrassing. It’ll happen to you.
The community calls new players "greenbeards," and the veterans — "greybeards" — are generally helpful. But the game’s systems? Not so much. So let’s fix that.
Why Players Struggle — The Real Frustrations
Let’s get to the painful part. You’ve booted up the game, picked a class, and landed. You’re in a dark cave, a swarm music cue hits, and you die in three seconds. You don’t know where the drop pod is, and your teammates are yelling "PRESS C" and "MOLLY COME HERE." It’s a mess. Here are the real pain points that make people rage-quit:
- Navigation is a nightmare. The caves are 3D labyrinths. You don’t have a minimap in the traditional sense — you have a terrain scanner. I spent my first three missions digging straight down and falling into pits. The game doesn’t teach you how to read the scanner properly. You’ll get lost. It’s normal.
- Ammo economy. You run out of bullets faster than you expect. The resupply pods are shared with your team, and calling one at the wrong time will get you yelled at. I’ve seen greenbeards call a resupply when they’re at 80% ammo and the team is at 5%. Don’t be that guy.
- Friendly fire. It’s always on. Your Gunner with a minigun can rip through a teammate in two seconds. Your Driller can toast the Scout with a stray flame. It’s chaotic, and new players don’t realize they’re killing their own team until it’s too late.
- Team coordination. This is a co-op game that punishes lone wolves. If you run off solo in a Haz 4 (hazard level 4), you’re dead. The game’s difficulty scales with player count and proximity to objectives. Splitting up is a death sentence. I had a guy on my team yesterday who refused to stay near the group. He got eaten by a Praetorian in 12 seconds. Then he blamed me.
- Overclocks and builds. The progression system is confusing. You unlock weapons, then you need Overclocks (mods that drastically change how guns work) — but you get them from random events or deep dives. You might get a god-tier Overclock for the Engineer’s Breach Cutter or a garbage one for the Drill. It’s random, and it sucks when you don’t know what to grind for.
I remember a specific mission — Morkite mining, Haz 3, and I was the Scout. I ran out of flares, got separated, and a Bulk Detonator spawned right behind me. I panicked, shot it with my pistol, and it exploded, killing the entire team. We wiped. That’s the kind of frustration you’re up against. But it gets better. Trust me.
Getting Started / First Steps — What You ACTUALLY Need to Know Day One
Forget the training room. That thing is a waste of time. Here’s what you do on your first real mission:
- Pick a class that clicks. Don’t listen to tier lists. The Scout is high mobility, the Gunner is crowd control, the Driller is terrain modification, the Engineer is area denial. I recommend starting with Gunner — you’re tanky, your Shield Generator can save the team, and your Zipline Launcher helps you navigate. You’ll survive longer. Scout is fun but squishy — you’ll die to swarms if you can’t grapple fast enough.
- Learn the terrain scanner. Press Tab (default) to open it. This is your lifeline. The scanner shows you a 2D map of the cave network. Look for the blue pods (objectives), the green beacon (drop pod), and the yellow arrows (your teammates). Practice reading it while moving. I spent hours lost until I realized the scanner marks your own position and the direction you’re facing. It’s a game-changer.
- Molly is not your friend. The M.U.L.E. follows you automatically, but she’s slow and gets stuck on terrain. You can call her with X (default) to force her to come to you. This is critical during the extraction phase when she’s heading to the drop pod. Do not chase her — hold your ground and call her over.
- Ammo management 101. Look at the ammo counter on your HUD. Once you’re below 50% total ammo (count your grenades and secondary too), you can call a Resupply Pod with 5 (default). Only call it when you’re near the group or at a safe spot. A resupply pod gives 4 resupplies for the team. Each resupply refills 50% of your ammo and heals you for a bit. If you call it in the open, you’ll die before you can grab it.
- Light matters more than you think. If you’re the Scout, your Flare Gun is your primary responsibility. Light up the caves. Other classes have flares too, but the Scout’s is a projectile that sticks to surfaces. I’ve played with Scouts who never fired a single flare. They got kicked. You light the room, everyone sees the bugs, everyone survives.
- The pickaxe is a weapon. Don’t underestimate it. A heavy swing does 30 damage and can stun small enemies. It’s great for conserving ammo on Swarmers (the tiny bugs). Power attack (shift + click or default Q) does massive damage and can break armor. I’ve killed Praetorians with pickaxe combos when I was out of ammo. It’s desperate but it works.
Your first goal is to complete assignments (missions from the terminal) to unlock your first Promotion. Promotion lets you do Deep Dives and unlocks better gear. Focus on that. Don’t spend all your credits on beer — save them for weapon upgrades.
💡 Pro Tip — The "Iron Will" Save:
This is the single most important perk in the game for new players. Iron Will lets you get back up from being downed for 12 seconds. During that time, you can shoot, heal, or interact with objectives. If you reach a Red Sugar crystal (the healing mineral) or get a heal from a teammate within those 12 seconds, you stay alive. I cannot tell you how many times I’ve walked up, triggered Iron Will, and solo-ran the last 20 meters to the drop pod because my team was dead. Equip it on every class until you’re comfortable with higher hazard levels. It’s not a crutch — it’s a lifeline.
Expert Tips & Tricks — The Stuff That Makes You a Greybeard
Alright, greenbeard. You’ve survived your first ten missions. Now you want to stop being dead weight. These are the techniques the game never explains, but you’ll see in high-level play. This is where the game opens up.
- Zip lines are for positioning, not just traversal. The Gunner’s Zipline Launcher is often used to cross gaps. Noobs. Stick a zipline above a tunnel entrance, stand on it, and now you’re shooting down at bugs. They can’t reach you unless they’re Mactera (flying ones). It’s a safe platform. I’ve held entire swarms from a single zipline. Just watch out for Spitballers — their acid kills you fast.
- Platform placement for the Engineer. Your Platform Gun is for more than just bridges. Learn to shoot platforms under Nitra or Gold on the ceiling so the Scout can grapple up and mine. This synergy — Scout lights, Engineer platforms, Scout mines — is the core of high-level play. If you’re the Engineer and you see a high-up mineral, shoot a platform under it. The Scout will thank you. I’ve organized entire teams around this single mechanic.
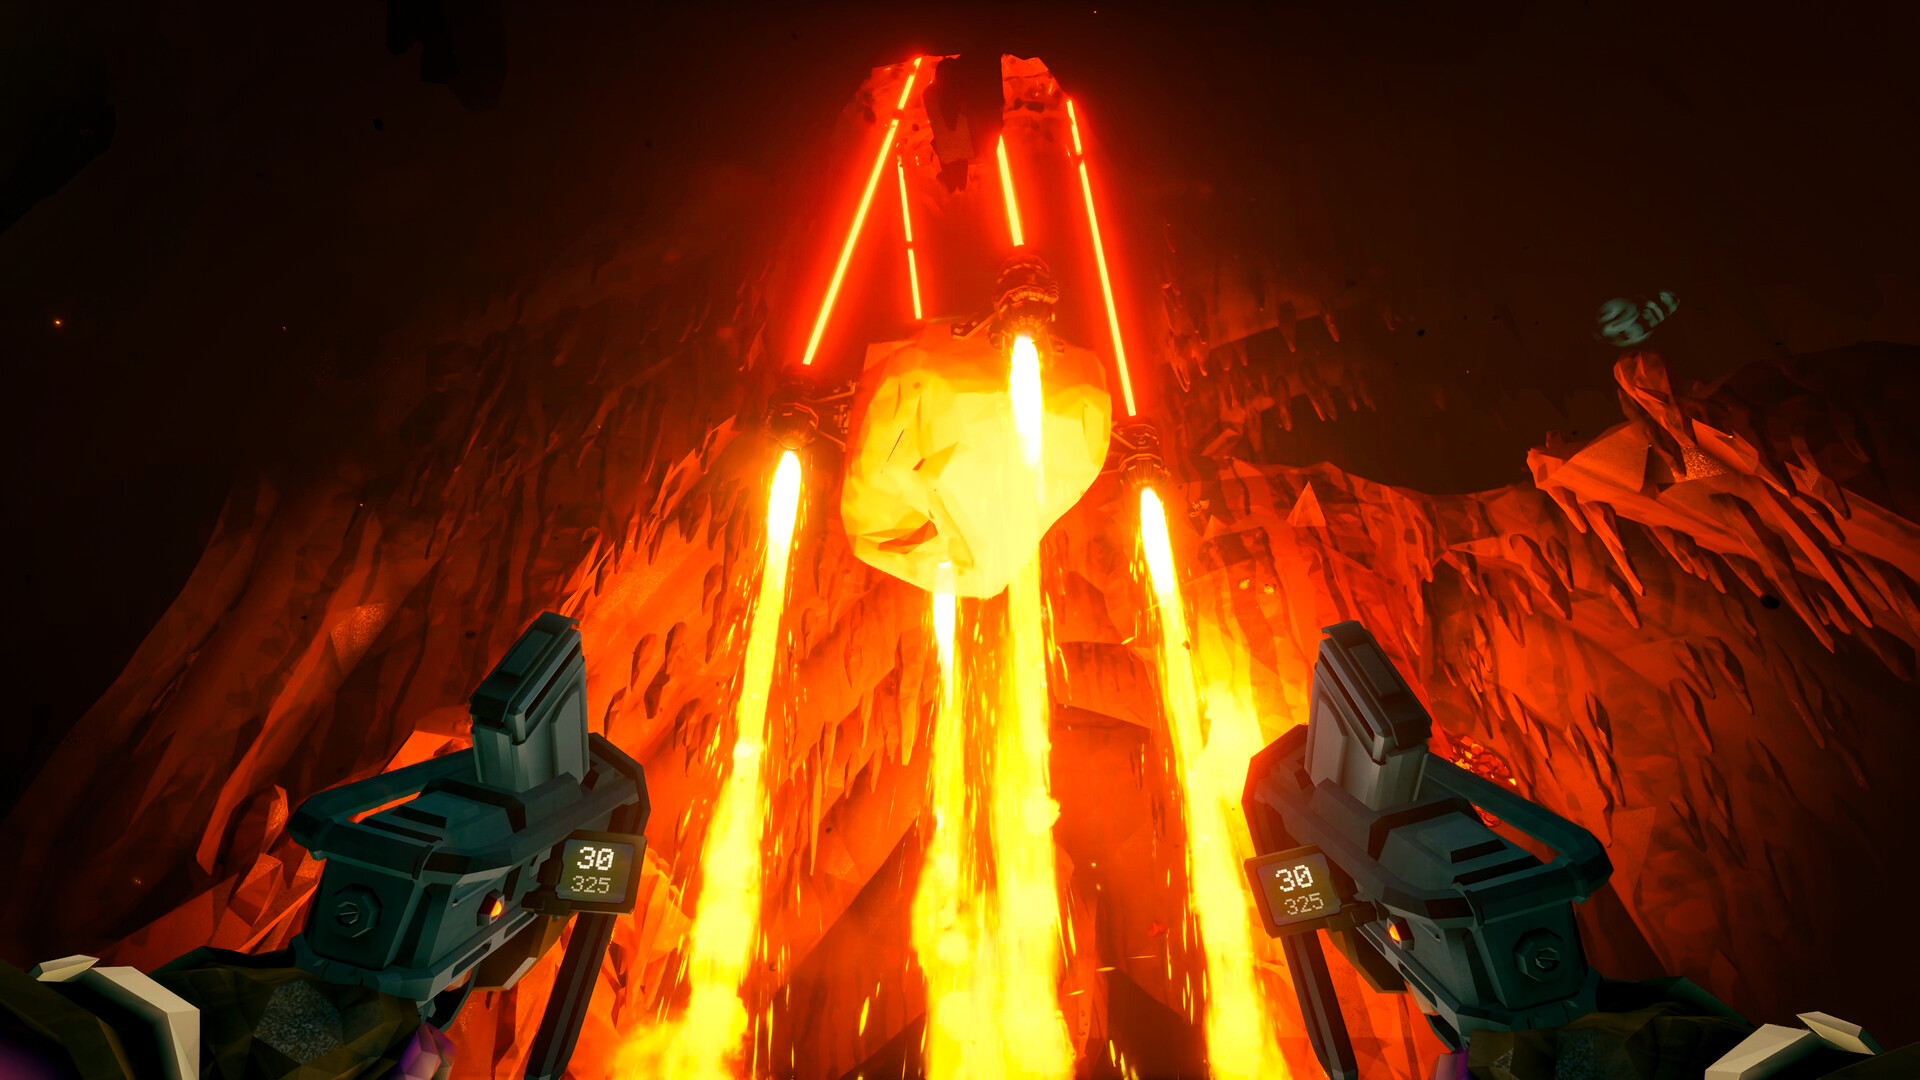
- Driller tunnels are your panic room. As Driller, your drills can chew through anything. When a swarm hits, drill a straight tunnel into a wall — a few meters deep, then turn 90 degrees. Bugs funnel in one at a time. You and your team can hold that chokepoint forever. It’s cheap, but it works on Haz 5. I did this on a Point Extraction mission and we survived a Bulk Detonator + double swarm combo. The bugs can’t flank you if there’s no flank.
- Scout’s grapple cancels fall damage. If you grapple to a surface and release the button before you collide, you don’t take fall damage. This takes practice, but it’s how you survive those long drops. Also, if you grapple to the ceiling and let go, you can power attack mid-air to break armor on a Dreadnought. It’s a suicide move, but it looks cool.
- Overclock priority. The grind is real. You get Overclocks from Machine Events (purple crystal things in caves) and Deep Dives. The best general-purpose Overclocks to hunt for: Lead Storm for the Gunner (turns your minigun into a DPS monster), Fat Boy for the Engineer’s PGL (giant radiation explosion), and Hipster for the Scout’s M1K (faster fire rate, better mobility). Ignore the meme tier ones — you don’t need a unique Shield overclock unless you’re bored.
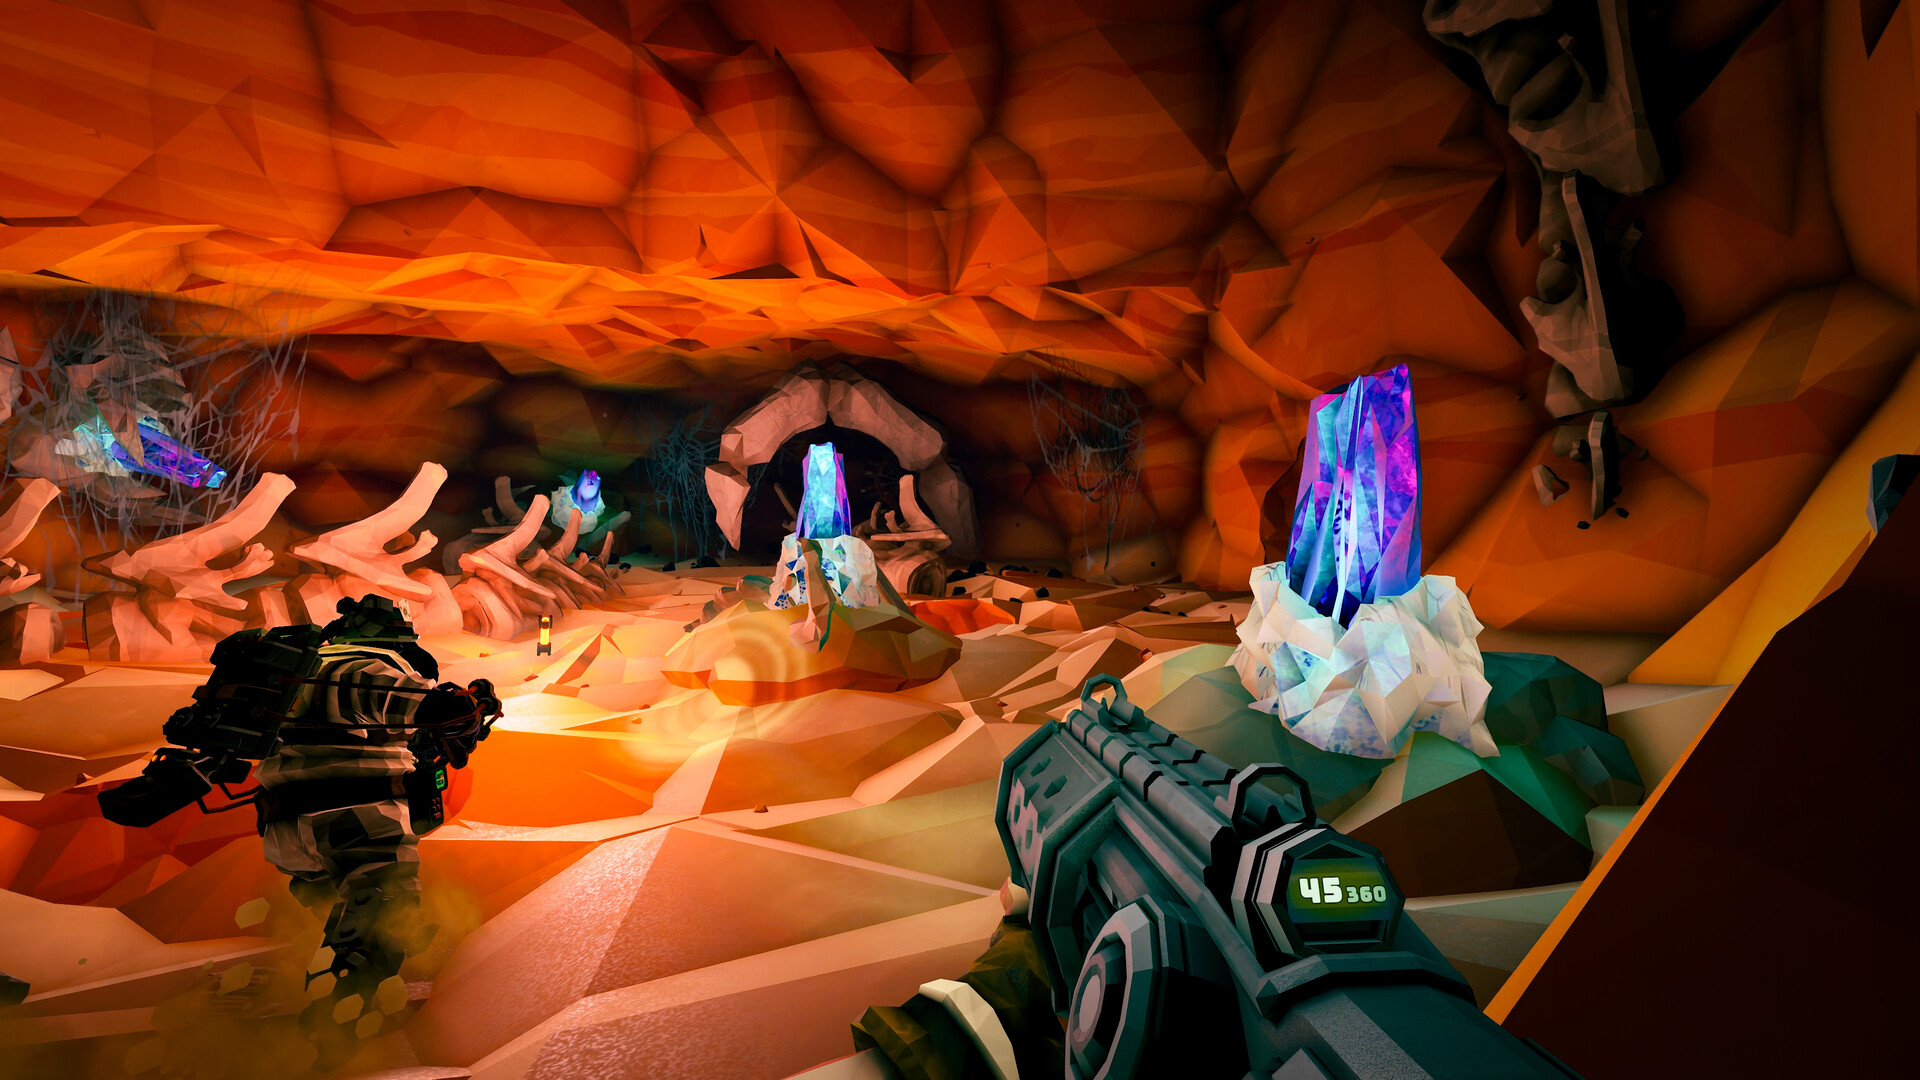
- Red Sugar is everywhere, but don’t hoard. You have a health bar, and you regenerate slowly. But Red Sugar crystals heal you instantly when you break them. If you’re at 50 HP and there’s a crystal nearby, break it. Don’t wait for a resupply. Resupplies are for ammo. Red Sugar is for health. I’ve seen people die with full Red Sugar pockets because they were saving it for "later." There is no later. You die now.
- Mactera priority. Of all the bugs, Mactera (the flying jellyfish things) and Tri-Jaws are the most dangerous. Their projectiles are homing and hit hard. Kill them first. I’ve wiped swarms of Grunts, only to have a single Tri-Jaw down the entire team in three shots. Shoot the glowing weak point on their belly.
One more thing: dash. The Dash perk is mandatory on every class except maybe the Scout (who has grapple). It gives you a burst of speed on a 25-second cooldown. It gets you out of situations you can’t jump out of. I’ve outrun Bulk Detonator explosions and Praetorian acid with it. There’s no downside. Take it.
Common Mistakes to Avoid — What Got Me Killed (Repeatedly)
I’ve made every mistake in this game. Every single one. Let me save you some time, and more importantly, some lost credits.
- Calling the drop pod too early. When you finish the primary objective, a button appears. Do not press it until you’ve finished the secondary objective (like collecting Fossils or Alien Eggs) and gathered enough Nitra for resupplies. The timer starts once you press it, and the swarm gets worse. I once pressed the button before grabbing all the gold. We had 30 seconds left and I was 60 meters from the pod. I didn’t make it. I lost 2000 credits worth of minerals. Don’t be me.
- Ignoring your team's minimap pings. Your teammates can ping objectives, enemies, and terrain. If someone pings a cave entrance or a mineral vein, look at it. It might be the only way forward. I’ve watched greenbeards ignore pings and dig into dead ends for five minutes. The ping is a communication tool — use it. The default is Ctrl + click, or F to ping directly.
- Using the wrong weapon for the wrong enemy. Your primary is for big bugs. Your secondary is for small ones. Your grenade is for emergency. I see people use the Thunderhead autocannon on Swarmers — it’s a waste of ammo. Use your secondary or pickaxe for Swarmers. The primary is for Praetorians, Oppressors, and Guards. Ammo is finite. Each shot counts.
- Standing still during a swarm. Movement speed is your best defensive stat. Jumping and strafing reduce the damage you take from projectile enemies. If you stand still to aim for two seconds, you’re dead. Play like a cracked-out dwarf. I’ve survived Haz 5 double swarms by never stopping. The bugs are dumb — they aim at where you were, not where you are.
- Forgetting to deposit minerals. You mine minerals, but they stay in your bag until you deposit them in Molly or the Mine Head. If you die, you lose half your bag of minerals. I’ve carried 300 Nitra for 10 minutes, died to a Leech (ceiling grabber), and spawned back with 150. The Leech got us all because we had no ammo. Deposit early, deposit often. Every time you pass Molly, empty your bag.
- Not watching for Leech zones. Who killed me more than any bug? The Cave Leech. These things grab you from the ceiling and hold you until you die. If your team doesn’t free you, you’re gone. Every cave with a high ceiling has Leeches. Look up. If you don’t see a Ceiling Leech, you’re not looking hard enough. I’ve lost count of how many times I’ve been grabbed while typing look up in chat.
- Over-revving equipment. The Drills and Platform Gun have limited ammo. Don’t spam them. A Driller who drills 50 meters for no reason has no drills left for the escape tunnel. A Gunner who wastes ziplines on every small gap has nothing for the final rush to the drop pod. Manage your tool ammo like it’s your primary.
One mistake that’s funny in retrospect: I thought Flares were infinite. They’re not. Each class has a set number of flares that recharge. If you’re the Scout and you run out of flares, the team is blind. I learned this the hard way when I fired my last flare into a pit and the entire Swarm descended on us in darkness. We wiped. Now I count my flares like bullets.
FAQ — Questions You’re Too Embarrassed to Ask
Q: Why am I dying so fast on Haz 2?
A: You’re probably standing in Gas (poison clouds) or Radiation areas, or you’re standing still. Haz 2 is forgiving, but standing in a gas vent will kill you in 10 seconds. Also, check your armor — you need to buy upgrades from the terminal. But really, if you’re standing out in the open, you’re a bug buffet. Get moving.
Q: What’s the best class for a new player?
A: Gunner or Engineer. Gunner has the most health and the Shield. Engineer has turrets that do the aiming for you. Avoid Scout until you’ve learned the maps — your low HP and reliance on movement will punish you. I started with Scout and died 40 times. Don't be like me.
Q: How do I get Overclocks fast?
A: Do Deep Dives once you’re promoted. They give you Overclocks on the first two stages guaranteed. Also, look for Machine Events (those strange alien tripods in caves) during normal missions. You’ll need a Promotion Core to activate them. Grind those assignments. The Weekly Core Hunt assignment is your best friend.
Q: Can I play with random people and not be a drag?
A: Yes, but say "hi" and "gg" at the end. Don’t take all the ammo. Watch your fire. If you’re not sure what to do, follow the highest-level player. If you see a veteran crouching and looking at something, they’re probably pointing out a Nitra vein or a hidden event. Mimic them. Communication is minimal in this game — 80% of it is pings and pointing.
Q: How do I escape the drop pod on time?
A: The pod lands, then a timer starts. You have about 4 minutes. When you’re at 1:30 left, start heading back. Don’t wait for the last minute. Molly will head back automatically, but if you’re far from her, she’ll be too slow. If you’re the Scout, you can grapple ahead and call Molly manually with X. Other classes need to stick with the group. If you’re alone and the pod leaves, you’re left behind. You don’t get the mission reward. It hurts.
Q: What’s the deal with Friendly Fire?
A: It’s 25% damage reduction for teammates, but it’s real. Your Cryo Cannon freezes allies, your Flame Thrower burns them, your Bulldog revolver one-shots a downed teammate. Be careful. If you’re the Driller and you see a teammate in a swarm, don’t spray the swarm if they’re in the way. You’ll kill them faster than the bugs.
Q: Is Bosco a replacement for a team?
A: No. Bosco is your solo helper bot. He mines, fights, and revives you once per rearm. But he’s slow and dumb. Solo play is possible but harder than multiplayer. The game is built for 4 dwarves. If you’re solo, you’ll struggle with swarms. I’ve beaten Haz 4 solo with Bosco, but it took hours of practice. If you’re new, play with others. Use the Server Browser (NOT Quick Join) to find games with low ping and open slots. Quick Join throws you into missions that are already failing.
Q: I keep getting pinging from teammates pointing at my head. Why?
A: They’re telling you to look up or get out of the way. If someone pings you repeatedly, they’re either mocking you or warning you about something behind you. In my first week, someone pinged me 8 times before I realized a Praetorian was right behind me. I died. Don’t be that dwarf. Look around when pinged.
Sign in to post a comment.
Sign in with GitHub to join the discussion.
💬 Comments
What players are saying:
Finally someone who actually explains the terrain scanner. I had 100 hours and still got lost. The tip about calling Molly with X during extraction saved my team from three fails in a row. Also the Iron Will + Red Sugar trick is brilliant — I always wasted it running for the pod. My only nitpick: you left out how to spot buried loot. There’s a faint sparkle effect on the ground. Please add that.
Disagree hard on the Dash perk. I’ve been running Thorns for passive damage on Swarmers and it’s way better for my playstyle. Dash might save you once a mission, Thorns saves you 50 consecutive hits from the little bastards. But the rest of this guide is spot-on. The Driller tunnel tip got me through a Haz 5 elimination mission. Drilling that 90-degree turn is priceless. Also, the leech paragraph is painfully accurate — I’ve been grabbed while writing “lol” in chat.
As someone with 300 hours on Scout, I laughed at the “don’t start with Scout” advice. It’s true. I was dead weight for my first 50 hours. But once you master the grapple cancel and learn to prioritize light, it’s the most satisfying class. The tip about not standing still? That’s the whole game. I’ve told my friends “never stop moving” and they still die to Mactera because they froze up. This guide is what I send to every new player in my Discord now. Good work.