

Skip to a section:
The Honest Take
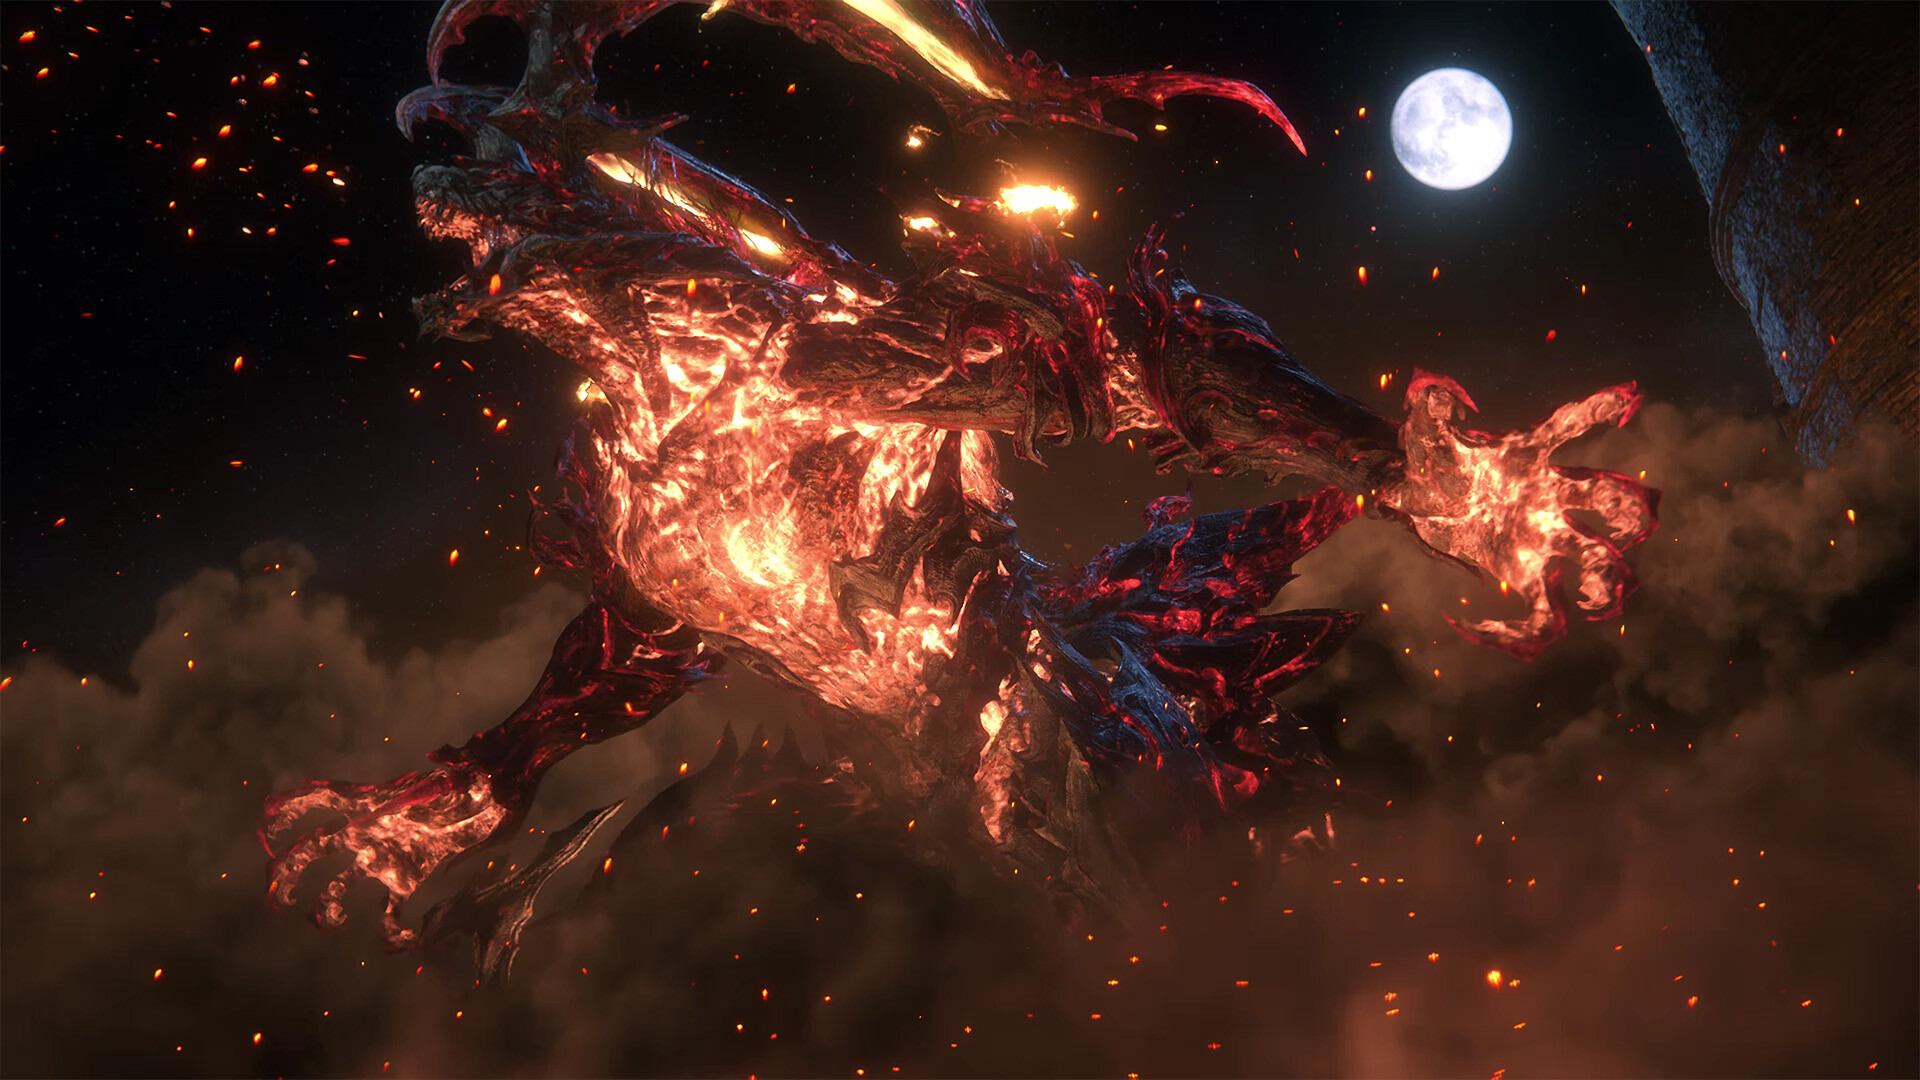
Look, I'm not gonna sugarcoat it: Final Fantasy 16 is not a traditional RPG. If you walked in expecting turn-based combat, a deep party system, or a sprawling open world, you're going to be pissed off for the first five hours. I know I was. I spent my first playthrough trying to play it like FF7 Remake, dodging and swapping characters, and got my ass handed to me on a silver platter by a giant wolf with an attitude problem.
But after 400 hours across three runs (including Final Fantasy mode on NG+), I've come around hard. This is a character action game dressed in Final Fantasy clothes—think Devil May Cry meets a political drama that actually cares about its characters. The combat is built around one guy, Clive, and a rotation of Eikon abilities that work like equippable special moves. There's no MP bar. No elemental weaknesses. No status effects that matter outside of one specific setup. It's pure spectacle and timing.
If you can get past the bait-and-switch of what you thought this game was, you'll find something genuinely special. It's got the best boss fights I've ever seen in a video game, period. But the game barely explains how to get good at it. So here's the guide I wish I had before my first Garuda fight made me rage-quit at 2 AM.
Why You're Probably Getting Wrecked
I've seen the same complaints on every forum for the last year, and here's the deal: the game teaches you the wrong things first. It hands you the basic sword combo and the Phoenix Shift in the first hour, and you think that's the core loop. It's not. The core loop is stagger management and cooldown rotation, and the game doesn't explain that until like 15 hours in.
Here are the specific pain points that made me almost refund the game:
- The dodge window is deceptively tight. Precision Dodge is frame-perfect—you have about 6 frames to input it. The game tells you to dodge "at the last moment," but that's like telling someone to hit a home run "with the middle of the bat." I dodged into attacks for three hours before I realized I had to dodge through the attack, not away from it.
- Rotation puzzles are garbage. The "press these three buttons in this exact order to open a gate" bullshit. There's a section in the Abandoned Mine where you have to hit three pressure plates in sequence, and if you mess up, you get a respawning Chimera that two-shots you. I lost 45 minutes to that. You're not bad at the game—the puzzle design is just archaic.
- Item management is a trap. You'll get 47 different types of crafting materials before you even understand what they're for. I hoarded everything like a dragon and ended up with 500 Bloody Hides that I never used. Meanwhile, I was getting folded by a boss because I didn't craft the Belt of the Gods that requires three specific items from a hunt two zones back.
- The combat doesn't click until you unlock the third Eikon. For the first 8-10 hours, you're basically playing with training wheels. You have Phoenix and Garuda, and your DPS is sad. Then you get Titan, and suddenly you have a parry, a shield, and a punch that actually hits hard. The game gets better the more tools you have, but it takes too long to get there.
If any of this sounds familiar, keep reading. I'm going to save you from the exact same frustration.
Day One: What Actually Matters
Forget the side quests. Forget exploring every corner. Forget upgrading every piece of gear. Here's your actual checklist for the first 10 hours:
- Rush the main story until you get Garuda's Eikon. You'll get it around level 15-20, and it unlocks Deadly Embrace, which is the single most important ability in the early game. It pulls smaller enemies to you and launches bigger ones into the air. Your entire damage loop revolves around launching enemies and keeping them in the air. Without it, you're fighting a ground war you can't win.
- Prioritize "The Blacksmith's Blues" side quest line. It's easy to ignore because it sounds like filler, but it gives you the ability to craft higher-tier gear without relying on shop drops. Do this quest the second it appears. The alternative is farming mobs for 3 hours for a 5% drop rate item, and I promise you, that's not fun.
- Spend ability points on the "Downpour" passive first. Your basic combo is weak. Downpour gives you an extra hit at the end of your sword combo that deals 40% more damage and generates more Will damage (the stagger bar). Most beginners spend points on flashy Eikon abilities first, but your basic sword hits are 60% of your damage until you get late-game gear. Make the sword hit harder.
- Do not waste gil on potions. You'll find like 50 of them in the field. I bought 99 High Potions from a vendor at hour 12 and had 120 by hour 20. Save your gil for Orchestrion Rolls if you're a collector, or just hoard it for the endgame crafting that costs 20,000 gil per piece.
- Ignore the "Active Time Lore" system until a cutscene confuses you. It's a great feature, but pausing every 2 minutes to read about some king you'll forget the name of ruins the pacing. Use it when you're genuinely lost, not because it's there.
One more thing: leveling means almost nothing in this game. Levels increase your base stats by a tiny amount, maybe 2-3% per level. The real power comes from gear upgrades and ability unlocks. If you're struggling with a boss at level 30 with level 15 gear, a level 35 with level 15 gear will still get wrecked. Upgrade your sword.
⏰ Pro Tip from a 400-hour vet:
The Titan Sword from the Hunt Board (kill the "Svarog" mark, required level 20) is the best weapon until you finish the main story. It has a hidden 15% damage boost against staggered enemies that the game doesn't list in the stats. I ran the math—it out-damages the next three swords in the crafting tree. Go get it as soon as you unlock the Hunt Board at level 15. You'll thank me when a boss has 10% HP left and your sword hit for 800 instead of 600.
The Stuff Nobody Explains Properly
You think you understand the combat system after 20 hours. You don't. Here's the real shit:
The Stagger System: It's a Math Problem
Enemies have two health bars: HP and Will (the orange bar). You need to drain the Will bar to Stagger the enemy, and then you get a damage multiplier while they're stunned. The multiplier scales with how often you hit them during the stagger window, up to 2.5x damage. The key insight nobody mentions: Eikon abilities do more Will damage than HP damage. So your rotation should be:
- Use Garuda's Deadly Embrace to yank them down and build Will damage fast.
- Swap to Titan's Upheaval (the ground slam) to chunk the Will bar by 30% in one hit.
- Once staggered, spam Phoenix's Flamethrower for 3 seconds (it does 45 base DPS but ramps to 120 after 3 seconds of continuous fire).
- Cancel the Flamethrower early if the stagger window is ending—don't let recovery frames waste your multiplier.
I see people on YouTube doing these elaborate 12-button combos that look cool but deal 20% less damage than this simple three-step. The game rewards burst damage during stagger windows, not stylish filler.
Parrying Is Not Optional (Even Though It Feels Like It Is)
The Precision Parry (press R1 right before an enemy's strike lands) doesn't just block damage—it triggers a free counterattack that deals 250% damage and generates a massive chunk of Will damage. Most players ignore it because the timing is brutal (10 frames). But once you learn the attack patterns of the four hardest enemies (the Hugo Kupka fight especially), parrying cuts the fight time in half. I spent 40 minutes on Hugo my first time. On my second run, using parries, I killed him in 12 minutes. Practice on the Iron Giant miniboss in the Imperial Camp—its haymaker punch has the most telegraphed windup in the game.
Ability Synergy: The "Lazy Shiva" Build
Most guides tell you to use Lightning Rod or Megaflare because they do big numbers. I disagree. The most consistent build for both trash mobs and bosses is the Shiva-based freeze build. Shiva's Rime ability (circle of cold that freezes enemies) plus Phoenix's Heatwave (ranged fire slash that explodes on frozen targets) creates a freeze-shatter combo that deals 1.8x damage to the frozen enemy and spreads cold to nearby mobs. The game never tells you fire + ice = explosion like this. It's not an elemental weakness thing—it's a specific ability interaction. For maximum effect:
- Drop Rime on a group.
- Immediately fire Heatwave through the frozen mob.
- Watch everything under level 35 die in one animation.
This build is dirt cheap on ability points (you only need Rime at rank 3 and Heatwave at rank 2) and carries you through the entire midgame. I used it for 40 hours straight and only swapped to a Bahamut build for the final two bosses.
This combo system is similar to how Hades handles boon interactions—check out our Hades guide for more on stacking status effects for big pops.
Common Mistakes to Avoid
I made every single one of these so you don't have to.
- Using the "Auto-Equip Best Gear" button. The game's auto-equip prioritizes defense over offense. But this game is about killing things before they kill you. A sword with 5 more attack is always better than a belt with 10 more defense. Always manually equip the highest ATK weapon and the highest STR/DEX accessories. The game's auto-equip once gave me a Belt of the Bleak with 20 defense over a Belt of the Hunter with 15 defense and +5% crit rate. Dumb.
- Ignoring the "Training Mode" in the hub area. There's a training dummy at The Hideaway that's not just for show. You can test combos, check damage numbers, and practice parry timing without getting hit. I spent 30 minutes there each run practicing the Precision Parry on a dummy that has a looping attack animation. It's boring, but I went from "I can't parry worth shit" to "I parried Barnabas' five-hit combo" in one session.
- Saving all Mega Potions for "later." This is the classic hoarder problem. Mega Potions restore 100% HP and 50% limit break gauge. They're designed for bosses. I reached the final boss with 12 Mega Potions in my inventory and didn't use a single one until the third phase. Don't be me. Pop them when you're below 30% HP in any major boss fight. They're farmable endgame, but useless if you're dead.
- Not reading ability descriptions carefully. Some abilities have hidden conditions. Bahamut's Flare Breath says it deals damage over time, but what it doesn't say is that the damage is reduced by 30% if you move. You have to stand still for the full channel. I thought the ability was garbage until I realized I was canceling it early every time. Same with Odin's Gungnir—it has a 1.5 second charge time where you're vulnerable. You're supposed to use it as a finisher, not an opener. Read the fine print.
- Thinking "Limit Break" is a panic button. It's not. It's a damage buff button with a free heal and super armor. You should activate it when you're about to unload your full kit, not when you're about to die. The Regen effect from Limit Break is constant, so popping it early in a fight gives you more total HP over time than using it as a last resort. I lost count of how many times I used Limit Break to survive a big hit, then didn't have it during the stagger window when I needed the 2x damage multiplier.
Questions You're Too Embarrassed to Ask
Q: Is the combat actually good or is it just flashy?
A: Both. The flashy stuff is real—the boss fights have spectacle that puts most movies to shame. But the combat depth is hidden behind the stagger system and Eikon cooldown management. If you learn to optimize your ability rotation, it's as deep as any character action game. If you just mash square, you'll find it shallow because you're ignoring the mechanics.
Q: Why are my damage numbers so low in the late game?
A: Check your gear level. There's a hidden stat called "Attack Power" that's separate from your raw ATK. Each area has a recommended Attack Power threshold. If you're below it, you deal reduced damage. The game doesn't show this directly, but if you take a hit from a mob and lose 60% of your HP, you're undergeared. Grind the Hunt Board marks for better materials and visit Blackthorne at The Hideaway to craft the next tier.
Q: Can I respec my ability points?
A: Yes, and it's free. Any time you're at a Modification Gate (the large blue crystals in the field) or in The Hideaway, you can reset your ability points and redistribute them. Use this liberally. I respec'd three times in one playthrough to test different Eikon loadouts. No penalty, no cost.
Q: Is the story worth paying attention to?
A: Unironically yes. It's a mature political fantasy with a slow start but a great payoff. The first 6 hours are exposition-heavy and feel like a Game of Thrones episode where everyone's talking about treaties you don't care about. But by the time you reach Drake's Head (around hour 12), the plot picks up and never stops. The final act hits harder than any Final Fantasy since FFX. Don't skip cutscenes, even if you're bored early on.
Q: How do I get more Eikon abilities?
A: You unlock new Eikons by progressing the main story. There are eight total (including a secret one). You get Garuda at level 15, Titan at level 25, Shiva at level 35, Bahamut at level 40, Odin at level 45, and the final Eikon after the story climax. Each gives you three abilities, but you can only equip six at a time (two per Eikon slot). Experiment with loadouts—the game expects you to switch based on the fight.
Q: Is New Game+ worth it?
A: Only if you're a masochist who loves damage sponges. Final Fantasy mode (NG+) doubles enemy HP, reduces your stagger window by 30%, and adds new attack patterns to bosses. It's genuinely hard and requires you to have perfect parry timing. I don't recommend it unless you've already beaten all the Ultimaniac challenges in the Arcade Mode. The reward is a new weapon and a few extra story scenes, but it's not essential. If you're a completionist, go for it. If you're just here for the story, skip NG+.
💬 Comments
What players are saying:
This guide is the only reason I didn't quit at the Garuda fight. I was doing the exact wrong thing—dodge-rolling away from attacks instead of through them. The Titan Sword tip cut my boss kill time in half. Still think the rotation puzzles are trash though.
Gonna push back on the Shiva build recommendation. I tried it, and while the freeze-shatter is fun on mobs, it falls off hard against bosses that can't be frozen (like most of the late-game Eikon fights). The Bahamut build with Lightning Rod + Megaflare is more consistent. Otherwise solid advice, especially the part about auto-equip being a trap lol.
400 hours and I never knew about the Hidden Stagger damage on the Titan Sword. That's some real vet shit. Also, the part about Limit Break being a DPS button instead of a panic button changed how I play. Went from struggling on Barnabas to no-hit runs in a week. This is the guide.
Sign in to post a comment.
Sign in with GitHub to join the discussion.