
What's in this mess:
Yeah, I've Been Where You Are
I bought Griftlands thinking I was getting a chill card game with funny space aliens. Forty hours later, I was screaming at my monitor because a gambling robot named Rook had just deleted my entire hand on turn two. Again. This game is mean. It's the kind of mean that makes you question your life choices, your deckbuilding skills, and why you ever thought negotiating with a murder-crab was a good idea.
But here's the thing: underneath that mean streak is one of the most satisfying strategy games I've ever played. It's not a roguelite in the Slay the Spire sense—it's more like a roleplaying game where your personality literally determines your combat cards. The day I figured out that you can win entire runs without ever drawing a weapon? That's when the game clicked. This guide is everything I wish someone had told me before my first twenty hours of getting absolutely wrecked.
Why This Game Keeps Kicking Your Teeth In
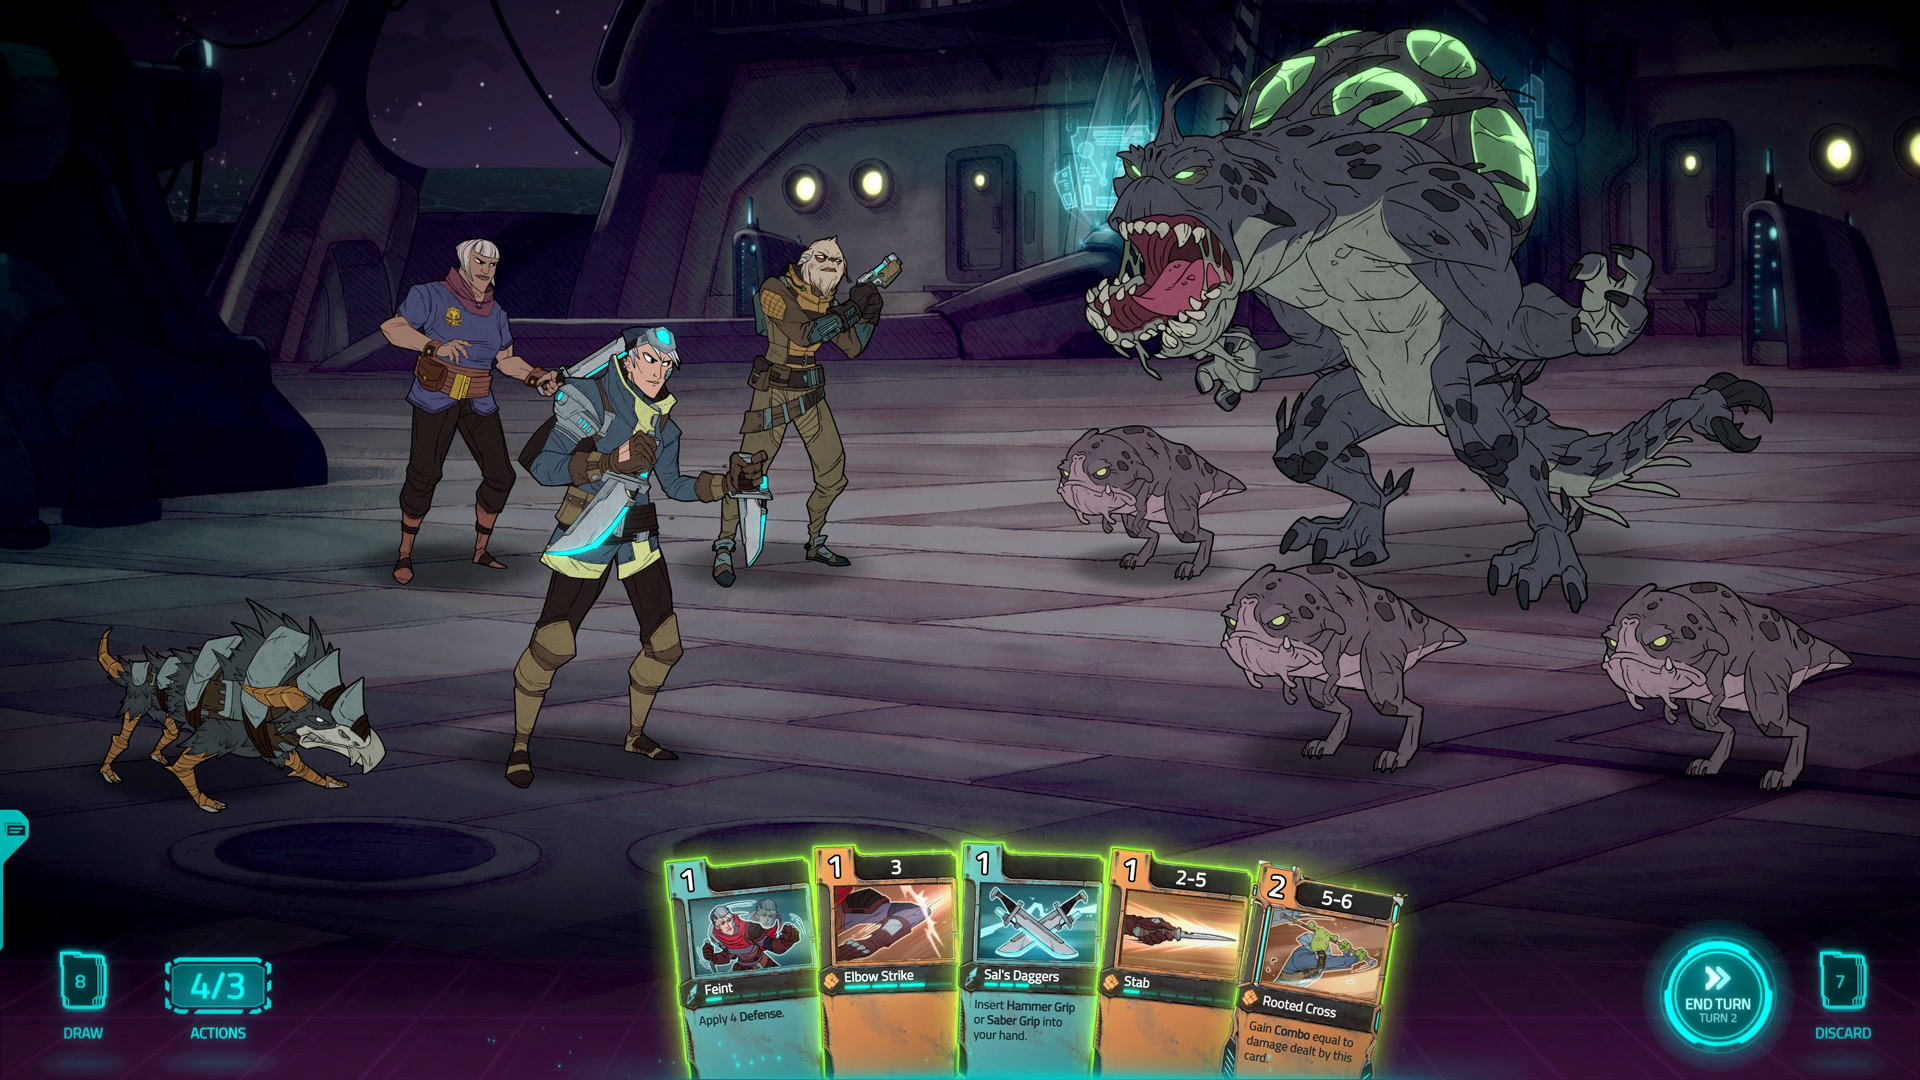
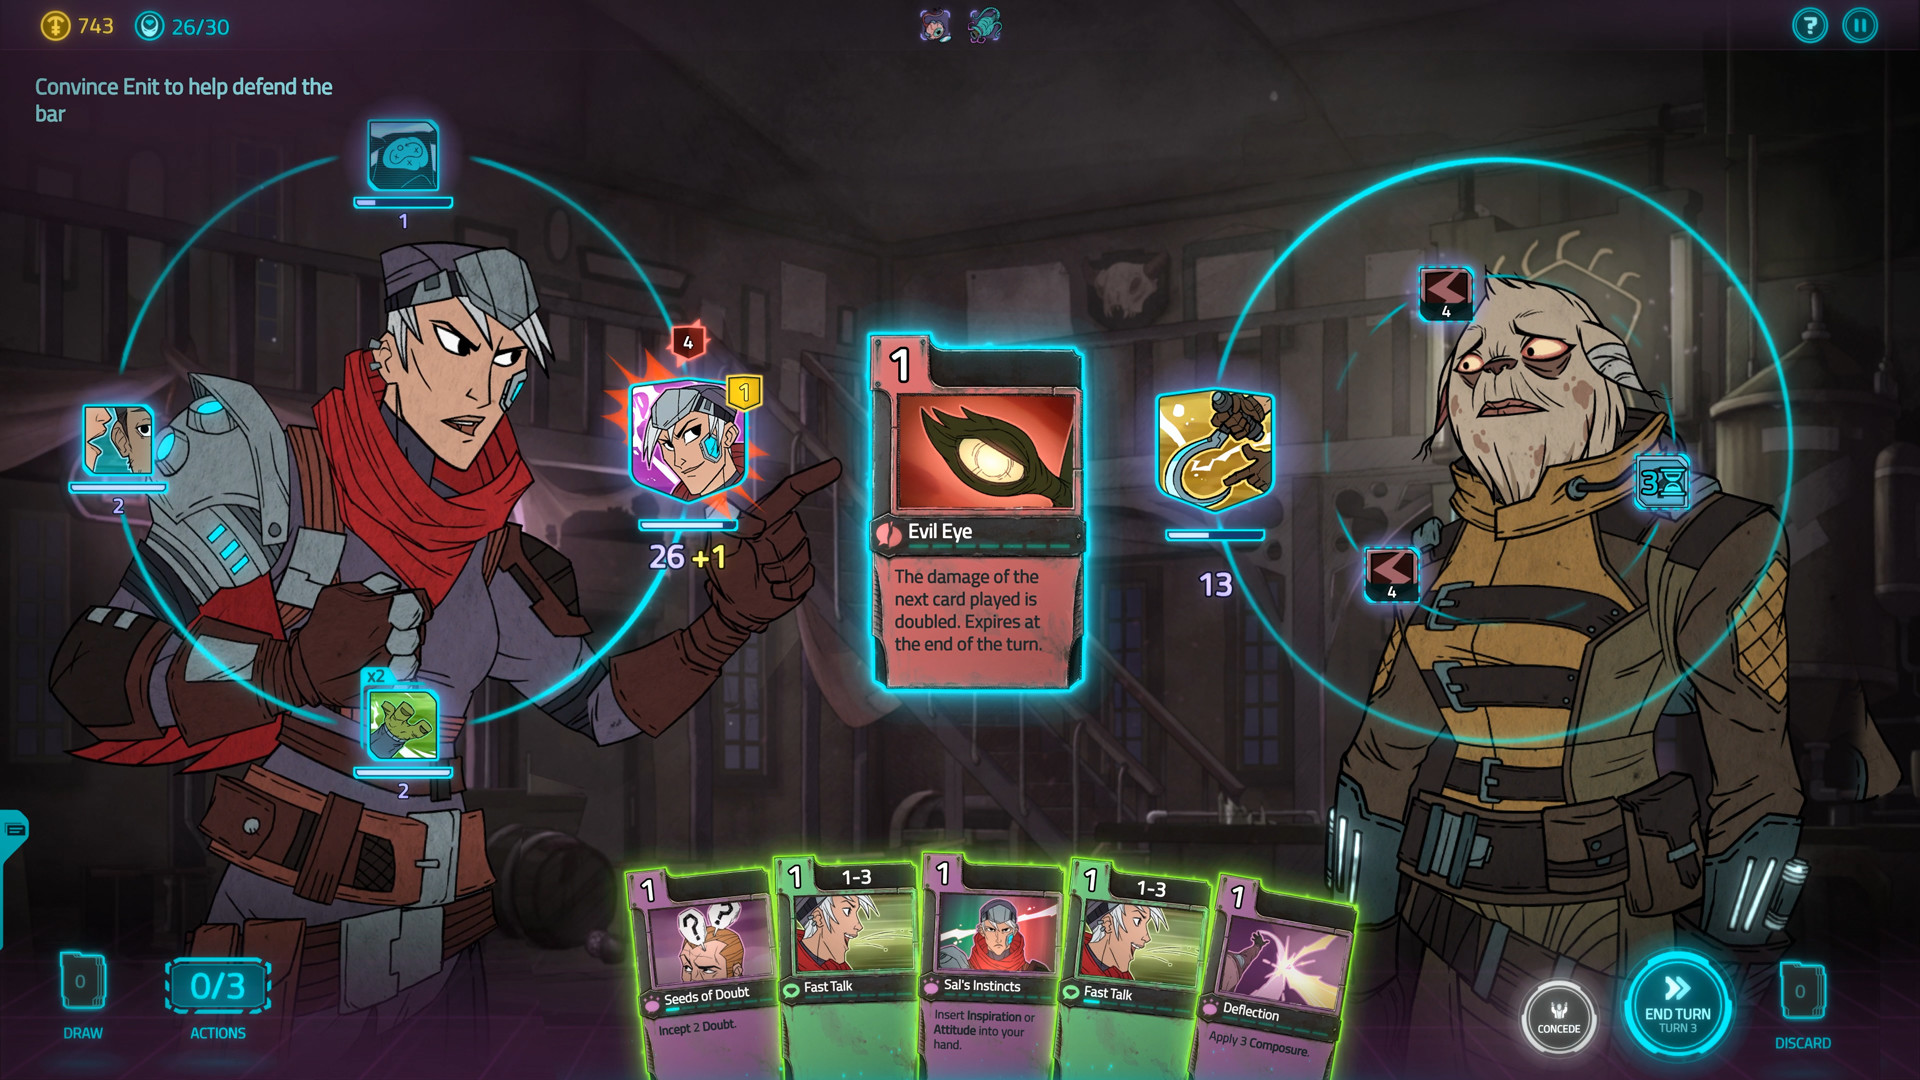
Let's talk about the elephant in the room. Griftlands has a learning curve that feels like a cliff face coated in ice. You're not just learning one combat system—you're learning two. There's battle, which is the usual hit-things-until-they-stop-moving thing, and then there's negotiation, which is a completely separate card game where you talk people to death. New players bounce off this harder than a rubber ball.
The biggest pain point is information overload. Your first run, the game throws three factions, two currencies, a reputation system, and a dozen character-specific quirks at you before you've even picked a starter card. I spent my first three runs playing as Sal, trying to stack poison damage, and got destroyed by the second boss EVERY TIME. Why? Because I was trying to play it like Slay the Spire. News flash: it's not Slay the Spire. You can't just build a poison stack and watch the numbers tick. The game punishes linear thinking.
Another huge frustration is that losing a negotiation can be worse than losing a fight. In most roguelites, if you lose a combat, you take damage. Here, if you lose a negotiation, you might lose your best card, get a permanent negative trait, or—and this is the worst—make an entire faction hate you. I once lost a negotiation against a shopkeeper and got a "Banned" status that prevented me from buying anything in that zone for the rest of the run. I quit for three days.
Then there's the RNG frustration. You'll draw a hand of seven cards and get four defense, two useless negotiates, and one attack that costs more than you have. That's not bad luck—that's you not understanding how the game's momentum system works. More on that in a second, but the short version is: the game rewards you for varying your play, not for stacking one strategy. The RNG feels unfair until you realize you were supposed to pivot three turns ago.
Day One: What You ACTUALLY Need to Know
Alright, deep breath. Here's the stuff that'll save you your first ten runs.
First: pick Sal. I know Rook looks cool with his robot arm and the magic dude seems mysterious, but Sal is the tutorial character for a reason. Her starting deck is balanced, her special ability (the knife flip) is flexible, and her personal story is the most straightforward. Save Rook for when you understand how resolve and dominance affect negotiation outcomes—because he needs that knowledge to function.
Second: understand the three-track system. Every character has three reputation tracks: Battle, Negotiation, and Exploration. You level each one up separately by doing specific actions. Battle exp from fighting, Negotiation exp from talking, Exploration exp from finding stuff on the map. Here's the trick that nobody says out loud: you can reset your reputation tracks between runs. Not all of it, but you can spend your earned shills (the blue currency) to keep certain upgrades. This means you don't have to re-grind everything every run. Spend your shills on the upgrades that let you draw extra cards or start with more composure in negotiations. Those are run-savers.
Third: learn the core combat loop. Each turn, you get a number of action points. Every card costs at least one. You also have a hand size limit—if you don't play cards, they carry over, but you can only hold six. The game wants you to play something every turn. If you hoard cards, you're missing out on the momentum bonuses that trigger when you play cards of different types (attack, defense, negotiate) in the same turn. The game literally gives you free composure and resolve for mixing it up.
Fourth: buy the cheap cards first. Yes, that rare-looking attack card with the big number looks sexy. But if you spend your opening money on one expensive card, you're broke and your deck is still thin. Buy the cheap Scratch and Shield cards from the first vendor. They cost 5-10 shills each and fill out your deck so you have consistent options. The expensive cards are traps until you know exactly what you're doing. I bought a Melt Cannon (40 shills) on my first run and then drew it three times in a row when I needed defense. I died to a basic guard.
Fifth: the day/night cycle is real. Each zone has a day and night phase. During the day, shops are open and NPCs are friendly. At night, danger level increases. Enemies hit harder and negotiations have higher stakes. Plan your route so you do shopping and questing during the day, and save combat-heavy side quests for night if you have a strong battle deck. The reverse is also true: if your negotiation deck is your strength, do talking quests at night when the rewards are higher.
PRO TIP — The one thing I'd tattoo on my arm:
When you enter a new zone, immediately go to the bar or tavern. Talk to everyone there. You'll find side quests, learn enemy weaknesses, and—most importantly—get free drinks that give temporary buffs for the entire zone. A "Moxie Shot" gives +1 resolve in all negotiations. That's the difference between winning and losing a critical conversation. I missed this for my first five runs and wondered why I was struggling. The bar is your first stop. Always.
The Cheesy Stuff That Actually Works
Okay, you've survived the first few zones. You understand the basics. Now let's talk about the strategies that turn a desperate run into a win.
The "Pacifist Run" is real and it's stupidly strong. You can win the entire game without ever attacking. Build a deck focused on defense and negotiate cards. In battle, just defend and use cards that apply fear or confusion. Enemies with fear will skip their turn. Enemies with confusion will attack each other. Stack these effects and you can clear entire rooms without dealing a single point of damage. The game respects this strategy—there's even an achievement for it. My most busted run was a Sal run where I had three Unsettling Gaze cards (applies fear to all enemies) and two Deflect cards. I walked through the final boss without taking a hit. Felt like a god.
Negotiation is a war of attrition, not a sprint. In a negotiation, you have resolve (your health bar for talking) and dominance (a temporary resource that decays each turn). The enemy has the same. Most new players try to burn the enemy's resolve down fast. That's a mistake. Instead, focus on boosting your dominance first. Cards like Bold Statement or Rhetorical Question give you dominance without damaging the enemy. Once your dominance is high, you can play the big damage cards for free or reduced cost. I've won negotiations with 20 resolve left because I stacked dominance for three turns before going for the kill. This is similar to how you'd approach a tough fight in Slay the Spire—check out our Slay the Spire guide for more on that patience-based strategy.
Gifts are OP. Abuse them. In shops and from certain events, you can buy gifts for faction leaders or key NPCs. Gifts boost your reputation instantly. A high reputation means cheaper shops, better quest rewards, and—critically—safe passage through faction territory. If you're friendly with the Hew Hope faction (the bird people), their guards won't attack you. That means you can walk through their territory without fighting. Saves you health, cards, and sanity. Always carry at least one gift for the faction that controls the next zone. I keep a "Cheap Trinket" (costs 8 shills) in my inventory at all times just for this purpose.
The "Gambler's Build" is a trap for noobs. I see so many players trying to stack the Lucky trait (increases card draw randomness but with higher highs). Don't do it. The game's RNG is vindictive enough without you actively making it worse. The Lucky trait sounds fun but it will cause you to brick on crucial turns. Stick with Calculated or Adaptive traits. They give you consistency, and consistency wins runs. Leave Lucky for the third run of the day when you're just messing around.
The "Composure" secret. Composure is the yellow resource that lets you play negotiate cards in battle and battle cards in negotiations. Most players treat it as a niche thing. It's not. If you have high composure, you can flex your deck into situations it wasn't designed for. For example, if you draw a hand full of attack cards but you're in a negotiation, composure lets you still play them as "Intimidate" effects. This is especially powerful with Sal, who has a card called Knife Flip that deals damage in both modes. Build around composure and you become unpredictable. The AI doesn't know how to react to a negotiator who suddenly throws a punch.
The Dumb Ways I Died So You Don't Have To
I have over 200 hours in this game. I've made every mistake. Let me save you the pain.
Mistake #1: Ignoring your starting deck's weaknesses. Sal's starting deck has almost no area of effect cards. I kept trying to build a deck that could hit multiple enemies, and I kept failing because I was trying to force a square peg into a round hole. Sal is a single-target assassin. Lean into that. Give her single-target damage boosts and defense. Don't try to make her a crowd-control mage. Similarly, Rook is about debuffs and control. Don't build him as a damage dealer. Play to your character's strengths. The game tells you what each character does in the character select screen—read that. Actually read it.
Mistake #2: Neglecting the "Bleed" status in negotiations. In negotiations, bleed works differently than in battle. It reduces the enemy's max resolve for the rest of the conversation. I used to ignore bleed cards because I thought they were too slow. Then I fought a boss who had 40 resolve and healed 5 per turn. I lost four times. On the fifth try, I stacked bleed to drop his max resolve to 20, then finished him off. Bleed is your answer to high-resolve enemies or enemies with healing. Don't skip it.
Mistake #3: Selling your cards to vendors. I know you need shills. I know that rare card you don't use looks like easy cash. But cards you sell become available to enemies. I sold a "Melt" card early in a run, and the very next zone, a boss used "Melt" to delete two of my cards. I sold another rare card and found it in a vendor's shop—at triple the price. The game's economy is designed to punish you for selling. Instead of selling, remove cards at a campfire or use a Forget card. It costs a little, but it doesn't buff your enemies.
Mistake #4: Treating every NPC like a friend. Not everyone needs to be negotiated with peacefully. Some NPCs, especially Spike and his crew, are better off just killed. If you try to negotiate with a character who has a "Violent" trait, they gain bonuses against negotiate cards. You're literally helping them by talking. Read the enemy's traits before you start any interaction. If they have "Belligerent" (takes reduced damage from negotiate cards), just fight them. You'll save composure and cards.
Mistake #5: Overthinking the journal. The in-game journal tracks quests, but it's not great at telling you how to complete them. I spent an entire run trying to "find the hidden cache" in a zone, running around every map tile, only to realize I needed to talk to a specific NPC at night. The journal doesn't tell you time-of-day requirements. If a quest feels impossible, switch to night mode or visit the bar again. That's almost always the solution.
Questions You're Too Proud To Ask
Q: What's the best character for a beginner?
A: Sal, no contest. Her story is linear, her deck teaches you balance, and her special ability is easy to understand. Rook requires you to manage a second resource (his "Rook's Gambit" charges) and the magic man is weird. Don't touch them until you've beaten the game once with Sal.
Q: How do I unlock new cards?
A: You unlock cards by leveling up your reputation tracks. Each level of Battle, Negotiation, or Exploration gives you a card reward. You also find cards in chests, as quest rewards, and from vendors. The best cards are often locked behind faction reputation. Build goodwill with a faction and their card pool opens up.
Q: Is there a way to avoid the RNG screwing me?
A: Partially. The game has a pity timer on opening hands—if you draw nothing but defense cards three turns in a row, the game forces an attack card into your hand on turn four. But more importantly, you can mitigate RNG by trimming your deck. A smaller deck means you draw your good cards more often. Get your deck down to 12-15 cards for consistency. Any more than 18 and you're asking for trouble.
Q: What's the deal with faction reputation? Do I have to pick a side?
A: You can be friends with everyone, but it's hard. Each zone has two factions. If you help one too much, the other gets angry. Angry factions send assassins after you and close their shops. My advice: in each zone, decide which faction's rewards you want more, and focus on them. Ignore the other faction's quests. You can repair the damage later, but during a run, you don't have time to please everyone. This is a game about making hard choices—the same kind of tough decisions you'd face in a game like Hades, where you can't max every relationship in one run. Check out our Hades guide for more on that balancing act.
Q: How do I beat the final boss (the Admiral)?
A: The Admiral has two phases. Phase one is a negotiation, phase two is a battle. For the negotiation phase, stack as much composure and dominance as you can. He has a card that destroys one of your cards permanently. Don't let his dominance get high enough to play it. For the battle phase, he summons minions that give him shields. Focus the minions first. If you kill the minions, his shields drop and he takes double damage for two turns. I beat him by using Sal's Knife Flip upgraded to +3 damage per bleed stack. I had eight bleed on him. He died in one hit.
Q: Can I beat the game without killing anyone?
A: Yes, there's a pacifist route. But it's harder. You need a dedicated negotiation deck and you'll have to skip some side content that forces combat. It's doable, but not recommended for your first win. Save it for run number five when you're bored of murder.
Sign in to post a comment.
Sign in with GitHub to join the discussion.
💬 Comments
What players are saying:
Wish I read this before I hit 50 hours. The tip about going to the bar first thing in every zone? That alone saved my next three runs. Also, he's right about selling cards—I sold a "Mind Sweep" to a vendor and the next boss had it. Never again.
I actually disagree about the Lucky trait. I've won three runs with it on Sal. You just need to build around the chaos. But for beginners? Yeah, avoid it. I lost eight runs in a row before I got good with it. The advice on composure is dead on though—that resource is the secret sauce nobody talks about.
The Admiral fight section is exactly what I needed. I was trying to burst him down and getting wrecked. Focus the minions and he folds like wet paper. Beat him on my next try. This guide is better than half the YouTube tutorials out there. Thanks, man.