
Skip the frustration — here's what we're covering:
I almost refunded this game
Look, I'm going to be straight with you. I've been playing Homeworld since 1999, back when you had to install off three CDs and the manual was thicker than a textbook. I bought Homeworld 3 on launch day, booted it up, and spent my first three hours feeling like someone had replaced my brain with wet gravel. The tutorial told me how to move ships but didn't tell me why I was losing every single skirmish within ten minutes. I alt+F4'd twice. I almost refunded it.
But I didn't. Because buried under the chaos and the controller-disorienting 3D space is genuinely one of the best RTS games I've ever played. The problem is that the game is terrible at teaching you how to actually think in three dimensions while managing resources and not getting your entire fleet deleted by a single bomber squad. That's where this guide comes in. I've got about 200 hours logged now, and I've made every mistake you can possibly make. I'm writing this so you don't have to learn the hard way that the Ion Cannon Frigate is a trap for new players (spoiler: it really is).
If you're coming from Homeworld Remastered, some of the muscle memory will help, but a lot of the meta has shifted. And if you're brand new? You're in for a fight. Let's fix that.
Why the hell is this so hard?
Let's name the pain points because pretending they don't exist is why you're stuck. Here's what's actually kicking your ass:
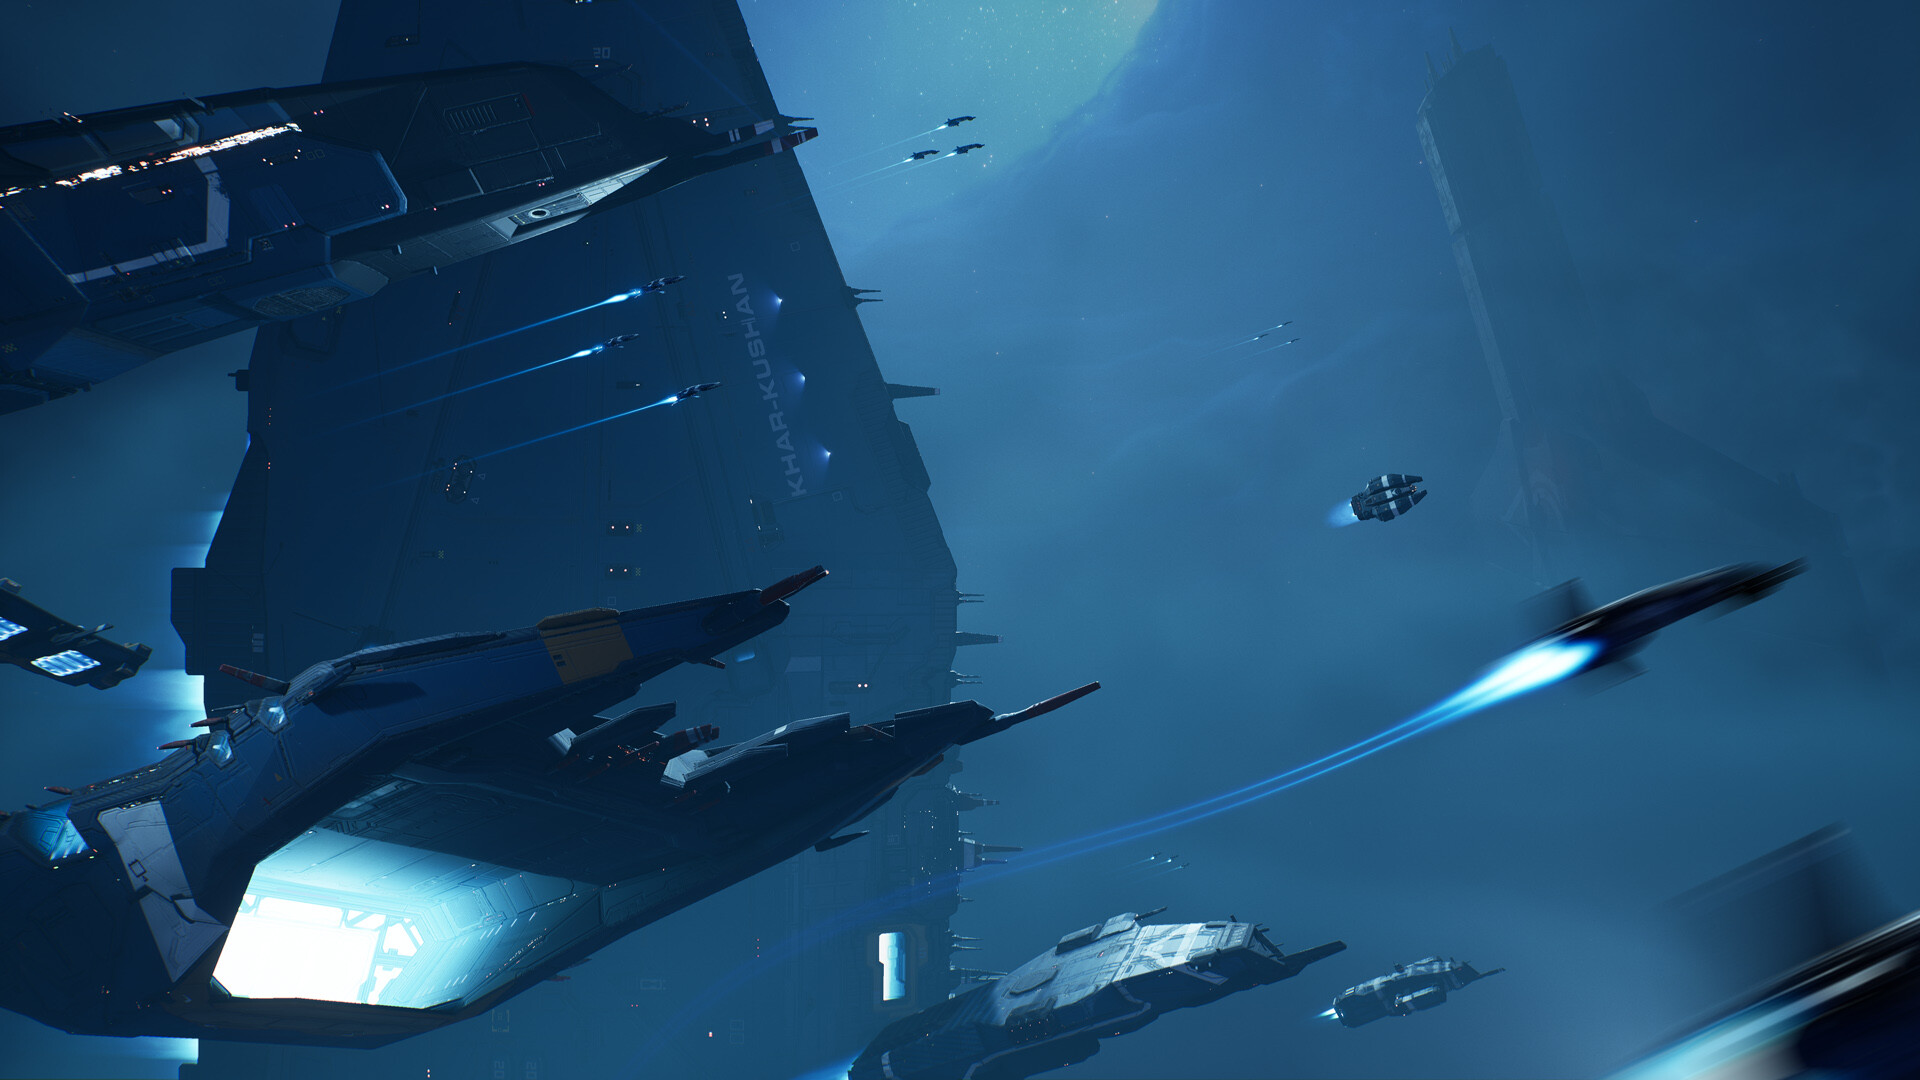
The camera and movement system is from another planet. You're used to dragging a box and clicking a minimap. Homeworld 3's camera operates on a spherical coordinate system that feels like you're piloting a spaceship with a mouse. I spent my first five missions accidentally sending my entire fleet into an asteroid because I misjudged the Z-axis. The game doesn't tell you that you can hold middle mouse button and drag to rotate the camera freely, or that you can double-tap a ship to focus your view. This is not obvious. I literally wrote this down on a sticky note and stuck it to my monitor.
Resource management is punishing. You have three resources: RU (Resource Units), Population Cap, and Fuel. Fuel is the new bastard child nobody warned you about. Your strike craft (fighters, bombers, corvettes) have limited fuel. Run out of fuel in the middle of a fight and they just drift. They're sitting ducks. I lost an entire wing of bombers to a frigate because I forgot to bring a support cruiser to refuel them mid-battle. The game doesn't pop a warning. They just stop shooting and float into enemy fire like they're on a lazy river.
The AI is aggressive and it cheats. Not in a cheap way, but the AI knows exactly where your weak points are. It will send a single probe to scout your position, then exactly sixty seconds later, a full strike force will warp in right on top of your resource operations. I've seen it happen so many times I've started building flak frigates before I even finish my first research tier. You need to expect that the AI is going to hit you where you're weakest, not where you're strongest.
Ship roles are not clearly explained. The game gives you names like "Interceptor," "Bomber," and "Corvette," but doesn't tell you that your Interceptors are useless against capital ships. They'll tickle a destroyer for seven minutes while the destroyer vaporizes them in one volley. You learn this by losing your entire fighter wing. Repeatedly.
Stop everything and do this first
Before you even touch the campaign, do yourself a favor: play the training missions twice. I'm serious. The first time, you'll fumble through them. The second time, actually pay attention to how the camera rotates and how fuel mechanics work. The game lets you skip the tutorial, and the first time I did, I regretted it for the next six hours. Don't be me.
Here's what you actually need to know on day one:
- Your Mothership is not a battleship. It's a fabricator and a carrier. If it gets into a direct fight, you've already lost. Park it behind something — an asteroid, a nebula, your own frigates. The enemy AI will absolutely send a frigate squad to snipe your mothership if you leave it exposed. I lost a 45-minute skirmish because I got cocky and moved my mothership forward to "help." It died in 18 seconds.
- Build at least two Resource Collectors on your first resource node. I know the interface shows one at a time, but you can queue multiple from the same command. The faster you strip a node, the faster you get your first frigate out. If you're slow on resources, the AI will have a battlecruiser while you're still building corvettes.
- Fuel management is a build order, not a reaction. You need a Support Cruiser within two jumps of any major engagement. Support Cruisers refuel and repair your strike craft. If you don't have one, your bombers will be useless after one attack run. I usually build two Support Cruisers per fleet: one with the main group, one on the resource node. This is not optional; this is survival.
- Learn to use the "Formation" hotkeys. Default is F1 through F4. The "Wall" formation (F3) is your best friend for frigate lines — it spreads them out so a single torpedo volley doesn't hit all of them. The "Claw" formation (F2) is good for strike craft, and the "Sphere" formation (F4) is actually decent for capital ships against fighters. Don't just leave ships in default formation; it's the worst possible spread for absorbing damage.
- Research order matters. Your first research should be Advanced Sensors (gives you a minimap that actually shows enemy movement) and Hull Integrity (15% more health on frigates). Do not research the Ion Cannon upgrade until you have at least three frigates. It's expensive and you need the firepower first. I rushed Ion Cannon tech in my first game and had exactly one frigate with a big gun that got ambushed by five enemy bombers. It exploded before it fired a shot.
PRO TIP — The thing I wish someone told me: You can rebind the camera rotation keys to A and D instead of the default middle mouse drag. Go to Options → Controls → Camera and set "Rotate Camera Left/Right" to A and D. This frees up your mouse for selecting units while you orbit the map. This single change took my APM from "angry flailing" to "actually tactical." I cannot stress how much this helps. Do it before your next match.
How to stop dying like an idiot
Alright, you've got the basics. Now let's talk about actually winning. These are the tactics that took me from "losing to medium AI" to "beating hard AI with a smile."
Strike craft are expendable. Your frigates are not. I spent so long trying to keep every fighter alive, micro-managing them away from flak bursts. Stop it. Interceptors cost 150 RU and build in 30 seconds. A single Frigate costs 600 RU and takes 90 seconds. Trade your fighters for information and screening. Send three interceptors ahead as scouts. If they die, they die. But if they spot an enemy fleet before it hits your resource ops, you've saved yourself 800 RU worth of infrastructure. I lost five interceptors scouting a nebula once, and that warning let me reposition my entire frigate line. Those five interceptors were the cheapest investment I made all match.
The "Ping" system is underrated. You can right-click on the strategic map and set waypoints with pings. I use this to mark enemy fleet positions, resource nodes I want to claim, and retreat paths. It sounds simple, but in the heat of a battle where you have 40+ ships and the camera is spinning, having a visual marker for "that's where the bombers are coming from" saves you from panic-selecting the wrong group. I use red pings for hostiles and green pings for resource nodes. Get in the habit early.
Counter the enemy fleet composition, don't just build your favorite ships. This is where most players plateau. They decide "I like ion frigates" and build ten of them. Then the enemy sends twenty bombers and you watch your expensive ion line evaporate. The rock-paper-scissors of Homeworld 3 is: Bombers kill capital ships, Interceptors kill Bombers, Corvettes kill Interceptors, Frigates kill Corvettes. That's the skeleton. If the enemy has a lot of bombers, spam Interceptors. If they have Interceptors, build Corvettes. If they have Corvettes, bring Frigates. I lost three skirmishes in a row because I kept building Frigates when the enemy had switched to mostly Corvettes. I felt like an idiot when I realized I was bringing tanks to a knife fight.
Fleet composition for a standard match: After about 50 hours, I settled on a ratio that works in 90% of situations. For every 1000 RU of fleet, I build:
- 3 Interceptors (scouting and bomber defense)
- 2 Bombers (capital ship deletion)
- 1 Corvette (medium patrol and interceptor counter)
- 2 Frigates (line backbone — mix of Flak and Ion)
- 1 Support Cruiser (fuel and repair)
Use terrain, for god's sake. Asteroids, debris fields, and nebula clouds block line of sight. If you position your frigates behind a large asteroid, the enemy has to fly around it or through a choke point where your flak and interceptors can shred them. I won a match where I was outnumbered 3-to-1 because I forced the AI to approach through a narrow debris corridor. My two flak frigates turned it into a blender. The AI doesn't flank well — it takes the most direct path. Abuse this.
Hyperdrive jumps are not just for travel. You can use the hyperdrive to dodge attacks. If you see a massive torpedo volley incoming on your battlecruiser, select it and jump it 500 meters to the left. The torpedoes miss, and your ship is now in a better position. This costs fuel but saves you a ship. I've done this in skirmishes and it feels absolutely dirty. The AI doesn't do it, so you have a massive mobility advantage if you learn to micro-jump.
The mistakes I made so you don't have to
I've got a list of bonehead moves that I made across my first 50 hours. Consider this a "what not to do" manual.
- Overbuilding Resource Collectors. I thought "more collectors = more resources faster." That's partially true, but each collector takes up population cap. I built eight collectors in one game and had no room for combat ships. I had a mountain of RU and zero ability to defend it. The enemy laughed and took my resources. Build 4 to 5 collectors max, then focus on combat ships.
- Ignoring the support cruiser until it was too late. I already mentioned fuel, but let me be blunt: I lost a battlecruiser worth 2000 RU because I didn't build a support cruiser and my bombers couldn't refuel. They sat on the edge of the battlefield doing nothing while the enemy frigate line pounded my capital ship. Support cruisers are not optional. They are the difference between a fleet that fights for two minutes and a fleet that fights for ten.
- Researching everything. The tech tree is tempting. I wanted all the cool upgrades. But research takes time and RU. In a 30-minute skirmish, you don't have time to research hull upgrades for frigates and bombers and corvettes. Pick one ship class to specialize in per match. If you're going frigate-heavy, research frigate hull and frigate weapons. Don't spread yourself thin. I researched anti-fighter turrets on my capital ships once and it gave me exactly +5 DPS against bombers. It was useless.
- Not using the "Retreat" command. There's a hotkey — I think it's R by default — that makes your selected ships turn around and move to your mothership at max speed. I didn't use it for my first 30 hours. I would manually drag ships back, which meant they stayed in formation and got shot in the back. The retreat command does a 180-degree turn and full burn. It saves ships. Use it when you see a frigate's health drop below 30%. Don't wait until it's smoking.
- Fighting in nebula clouds without sensors. Nebula clouds reduce your sensor range to basically zero. Your ships can't see the enemy until they're right on top of them. I sent a scout into a nebula once and it got ambushed by four enemy destroyers that I didn't see until my scout exploded. Build a Sensor Probe (it's a utility ship, cheap to build) and send it into the nebula first. It gives you vision without risking a combat ship. I now build two sensor probes before I even scout the first nebula in any match.
- Treating your mothership as a mobile base. It moves slowly. Very slowly. I tried to advance my mothership behind my fleet in one game, thinking I could use it as a forward repair station. It took so long to get there that by the time it arrived, my fleet was already dead. The mothership is a base. Keep it static and build a forward outpost if you need repair capability closer to the fight.
Questions nobody answers straight
Q: Why do my bombers keep dying instantly?
A: They're fragile. Bombers have low health but high damage. If you're sending them in without support, they'll get shredded by enemy interceptors or flak frigates. Always escort bombers with at least two interceptors per bomber wing. Also, don't send them on attack runs without a Support Cruiser nearby for refueling. They run out of fuel halfway through and become floating targets.
Q: What's the best starting faction?
A: For Homeworld 3, the two factions are the Hiigarans and the Taiidan. The Hiigarans have better strike craft and more flexible resource collection. The Taiidan have tougher frigates and capital ships. For a beginner, start with Hiigarans. Their strike craft are more forgiving, and you'll lose fewer ships while learning. Taiidan requires you to survive long enough to field heavy capital ships, which is harder when you don't know how to survive the early game.
Q: How do I actually use the 3D camera without getting dizzy?
A: You get used to it, but there's a trick. Bind Camera Orbit to your mouse side buttons or Q and E. I use Q for left orbit and E for right orbit. It's more intuitive than dragging the mouse. Also, switch to Top-Down Camera (press T) if you're in a tight fight. It flattens the perspective and makes micro easier. I use top-down for battles and free camera for scouting. This is the exact setup I use and it took my orientation from "nauseous" to "confident."
Q: Is the campaign worth playing first?
A: Yes, but the campaign is more narrative-driven than skirmish. It teaches you some mechanics but not all. The AI in campaign is also a lot easier than skirmish AI. I'd recommend playing the first three campaign missions to get a feel for the controls, then switch to skirmish against easy AI to practice fleet management. The campaign has some cool setpieces, but it won't prepare you for a real match against a human or hard AI. If you want to get good at the multiplayer or skirmish meta, jump into skirmish mode early. That's where the real learning happens. For a more thorough breakdown of campaign strategies, check out our Homeworld 3 Campaign guide.
Q: What's the deal with the "tactical pause" and should I use it?
A: Tactical pause (default Spacebar) freezes the game and lets you issue orders. In single-player and skirmish vs AI, use it constantly. It's not cheating; it's how you learn to manage your fleet without panic. I used it in my first 50 matches. It lets you assess the situation, select the right ships, and issue precise move and attack commands. In multiplayer, tactical pause doesn't exist (obviously), so wean yourself off it as you get comfortable. But for learning? Abuse it. It's your training wheels.
Q: I keep losing to early rushes. What's the counter?
A: The early rush comes in two flavors: bomber rush or corvette swarm. For bombers, build 2-3 flak frigates as soon as you hit 600 RU. Flak frigates have an area-of-effect shot that shreds bombers. For corvette swarms, build interceptors — they're faster and outrange corvettes slightly. The key is scouting. Send a single interceptor to the enemy base at the three-minute mark. If you see them building a production module early, you know a rush is coming. Start pumping out counter units immediately. I've survived rushes by scouting and switching my build order. The players who lose to rushes are the ones who don't scout. It's that simple.
Q: Is the Ion Cannon Frigate good or not? I'm confused.
A: It's good in specific situations, but it's not your general-purpose ship. The Ion Cannon Frigate deals 85 DPS to a single target and has long range. But it's slow, has no anti-fighter defense, and costs 450 RU. It's a glass cannon. If you build three Ion frigates and the enemy sends interceptors, you lose. Use them in pairs, always protected by at least one flak frigate. Use them to snipe enemy capital ships or static defenses. Do not use them as a line ship. The Flak Frigate (175 DPS vs fighters, lower vs capitals) is more versatile for a beginner. I wouldn't build an Ion frigate until I have at least five flak frigates on the field. That's the rule I use now.
Sign in to post a comment.
Sign in with GitHub to join the discussion.
💬 Comments
What players are saying:
Yo, the tip about rebinding camera rotation to A and D literally fixed my entire experience. I was about to uninstall because I kept sending ships into the geometry. Now I'm actually winning matches. The support cruiser tip saved my last game too. Great writeup, even if you're a little too nice to the Ion Frigate. That thing is still a trap. 😅
I disagree with the Hiigaran recommendation for beginners. I found Taiidan's tougher frigates way more forgiving because I kept getting my strike craft killed anyway. The guide's right about the fleet composition ratio though — I used that 3/2/1/2/1 split and it's solid. The nebula sensor probe trick was new to me. I've been losing scouts to nebula ambushes all week. Thanks for that one.
Finally a guide that doesn't read like it was written by a robot. The bit about trading interceptors for information hit me hard — I was so precious with my fighters and losing matches because of it. Played three skirmishes tonight using the "retreat on 30% health" rule and I actually extracted a frigate that would have died. My friends are gonna hate me when I pull the micro-jump dodge in our next game. Good stuff.