

Let Me Tell You About the First Time I Rage-Quit Once Human
I spent my first three runs trying to stack poison damage and got destroyed by the second boss EVERY TIME. Not because the game was unfair — although it kind of is at first — but because Once Human doesn't hold your hand. It whispers hints at you while a horror monster built from melted furniture and regret chews through your face. That first session? I uninstalled. Then I reinstalled two hours later because the atmosphere wouldn't leave my head.
This is not a "Games Journalist Guide to Having a Good Time." This is me, a guy with 400+ hours and a trophy case full of scars, telling you what I wish someone had told me. You're smart enough to handle this game, but the game is actively trying to make you feel stupid. Let's fix that.
Why Most Players Struggle (And It's Not Your Aim)
The biggest lie the tutorial tells you is that you can "experiment." You can't. Not without paying for it in corpses. The game throws you into a world where resources are scarce, enemies punish hesitation, and the crafting menu is about as intuitive as a Russian nesting doll made of spreadsheets.
Here are the specific walls you'll hit:
- Stamina starvation. You'll sprint for five seconds and watch your stamina bar evaporate while a shrieking abomination sprints for thirty. The game doesn't tell you that your base stamina regen is nerfed until you eat certain foods or equip specific armor mods.
- Inventory anemia. You'll have room for maybe three guns, a handful of meds, and the corpse of a mutant deer before you're over-encumbered. And the game punishes you for dumping items by making them despawn faster than your patience.
- The upgrade path is a trap. Early on, you'll find "Scrap Metal" and think you should save it for something good. You shouldn't. Upgrade your starting weapon to +3 immediately — that damage spike carries you through the first region. Hoarding is how you die with a full bag and an empty gun.
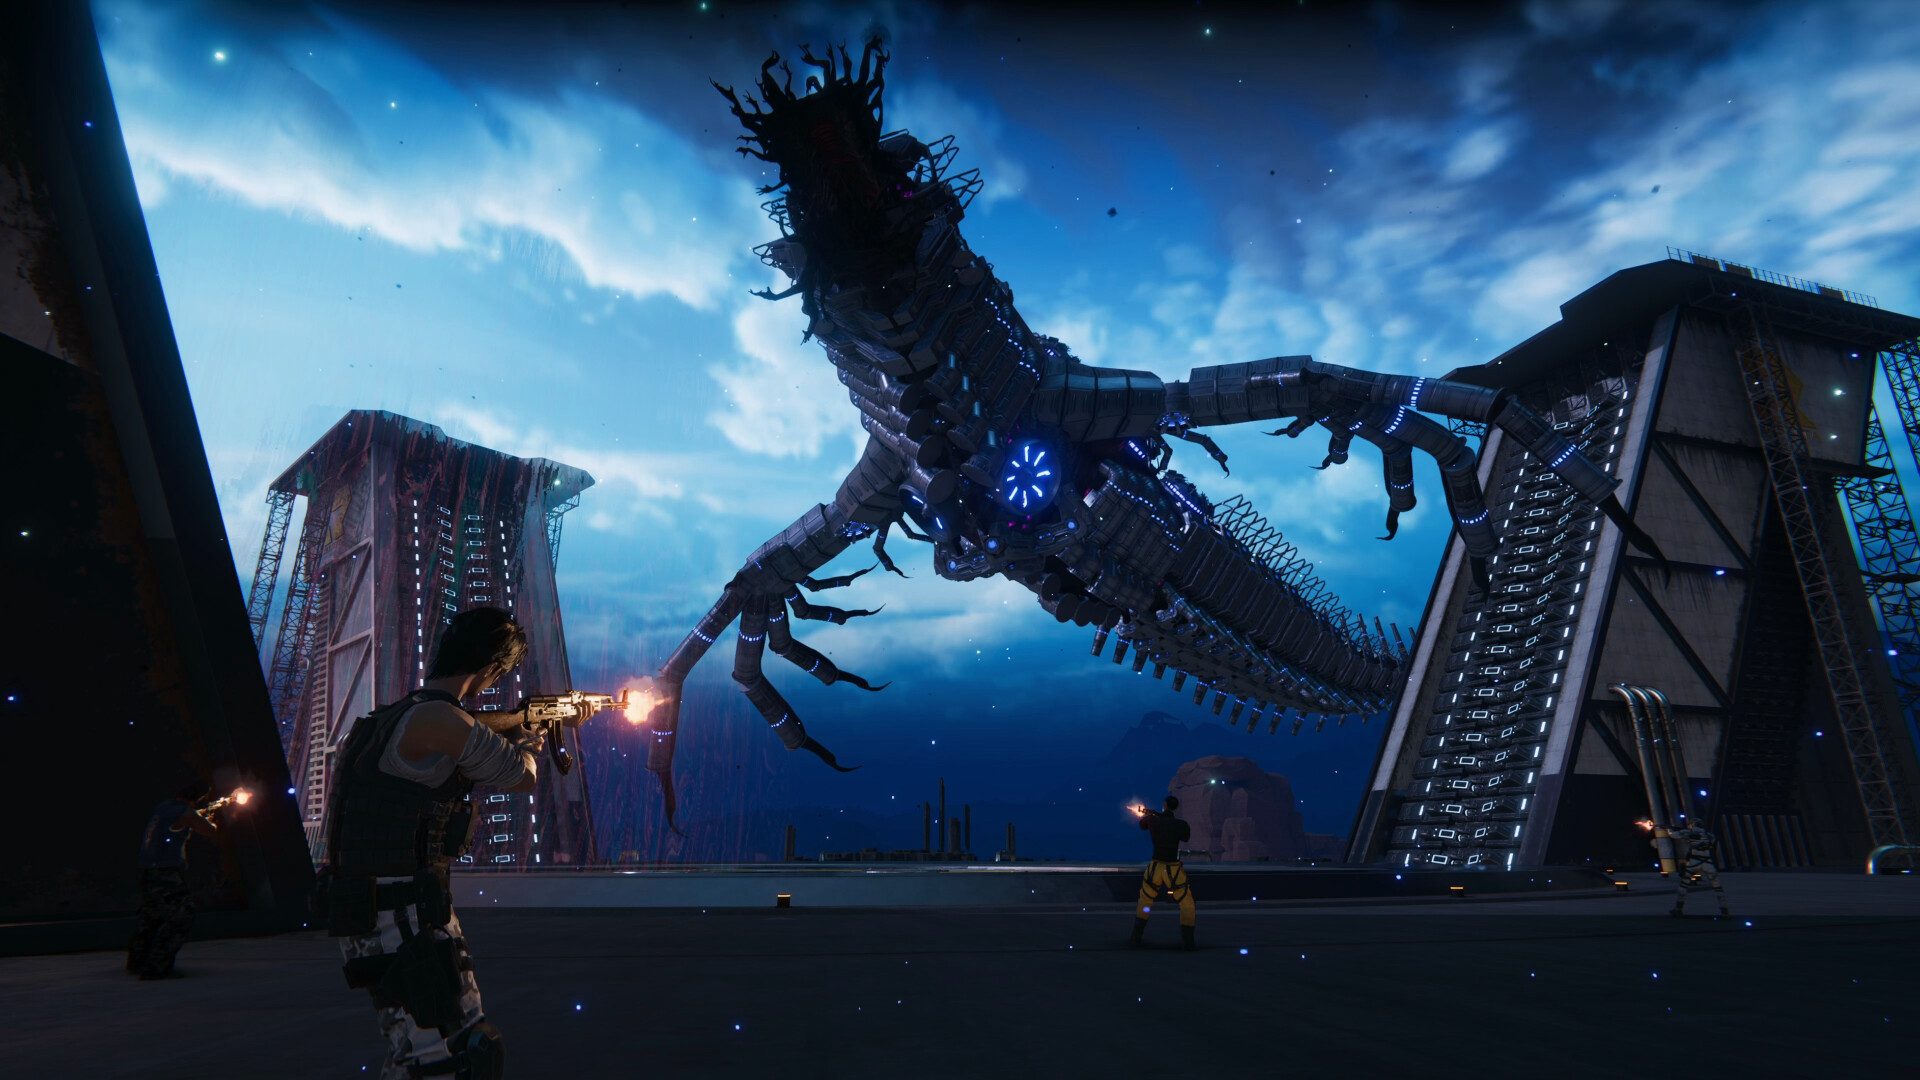
- Bosses with "gotcha" mechanics. The second boss, the Drowned Lament, has an AoE scream that one-shots you if you're inside a certain radius. No wind-up animation. No warning. You just explode. I lost three runs to that before I realized you have to break its left leg first to stagger it.
If you're reading this because you just got flattened by something that felt unfair — yeah, that's normal. The game respects your intelligence by punishing your ignorance. So let's get you educated.
Getting Started: What You Actually Need to Know Day One
Forget the story for a second. Here's your real checklist for the first two hours:
- Rebind your dodge. The default key is Space (or Circle/B on controller), but you need to toggle "Always Sprint" in options. I wasted an entire playthrough having to hold shift while trying to dodge backwards. Don't be me.
- Eat everything you find. The food system isn't cosmetic. Cooked Mutant Rabbit gives you a 15% stamina regen buff that lasts six minutes. Raw food poisons you. Always cook, always eat. Starving in this game gives you a debuff that reduces damage by 30%. I died to a basic shambler because I was reading lore instead of grilling.
- Rush the Titan Sword blueprint. It drops from the first major encounter in the Sunken Church area. This weapon has a base damage of 38 with a charged attack that deals 110% bonus damage to staggered enemies. Get it to +5 before you even touch the side quests. Trust me. That sword will carry you through the first zone solo.
- Build a bed first, not a forge. You spawn into a safe house area. Build a Sleeping Mat immediately. It gives you a rested buff that increases your health regen by 2 HP per second for 30 minutes. Also, it's your respawn point. Build it, then build the workbench.
- Loot everything that glows purple. Purple glow = Rare Materials like Fused Wiring or Strange Alloy. These are used for weapon crafting and armor upgrades. The game never tells you this. I spent a whole session leaving them behind because I thought they were quest items. They're not. They're gold.
One more thing: your starting pistol is trash. It does 14 base DPS and has a magazine of 12. The first SMG you find (the Whisper-9) does 28 base DPS with a 30-round mag. Ditch the pistol the second you see a blueprint for the SMG. The pistol's only use is for breaking barrels and making noise to distract enemies.
Expert Tips & Tricks — The Stuff I Wish I Knew 100 Hours Ago
You've made it past the first boss. Now the game starts revealing its actual depth. Here's where the rubber meets the road — and where most guides give you cookie-cutter advice. I'm giving you the surgical stuff.
Against the Bone Lord (third major boss), most players try to DPS race it. That's suicide. The Bone Lord has a mechanic where it becomes enraged after taking 25% damage in 10 seconds, making it deal 200% damage and move 50% faster. Instead, chip it for 20%, then back off. Wait 15 seconds. The rage timer resets. I beat it first try using this method after 4 wipes. Patience is a combat stat.
- Learn the "Animation Cancel" for reloads. Your character has a long, clunky reload animation. Right when the magazine clicks in (about 70% through the animation), tap Q (swap weapon) and immediately swap back. Your gun is loaded. The animation is cut. This shaves 0.8 seconds off every reload. In a game where you die in 2 hits, that's the difference between living and respawning.
- Armor sets matter more than individual stats. The Nomad Set (found in the Crimson Canyon loot caches) gives a 4-piece bonus of +25% movement speed while aiming. That sounds niche until you're kiting a boss that one-shots you. Mixing sets without checking the set bonus is how you end up with +10 armor but 0 utility. I made that mistake and got stunlocked by a pack of mutated dogs.
- Use your environment as a weapon. Gas canisters explode for 150 base damage. Water puddles conduct electricity — throw a Shock Grenade into standing water to electrify it for 4 seconds, dealing 40 DPS to anything standing in it. There's a boss fight in the Flooded Sewers that becomes a joke if you kite it into the water. The game never tells you this, but it's written into the physics engine.
- The Flamethrower is a sleeper weapon. It does 45 base DPS but ramps to 120 base DPS after 3 seconds of continuous fire. Most players ignore it because of the range. But against the Swarm Mother (a late-game boss that spawns adds), it's the only weapon that can clear the spawns and damage the boss simultaneously. Pair it with the Thermite Mod (burns for 6% of max HP over 8 seconds) and you trivialize the entire horde mechanic.
- Crafting: Always use the Quality Hammer. When you craft gear at a workbench, you can use a Quality Hammer to "reroll" the rarity tier. It costs materials, but a Blue (Rare) weapon does roughly 20% more damage than a Green (Common) version of the same weapon. Save your hammers for the weapon you main, not your sidearm. I wasted 8 hammers trying to upgrade a secondary shotgun before I realized it was a waste of resources.
One more thing about the Flamethrower — it's terrible against single, fast targets like the Stalker class enemies. Don't use it there. The Hunting Rifle with a Scout Scope (headshots deal 3x damage) is your go-to for those fights. I learned this after trying to fry a Stalker and watching it dodge my flames for 45 seconds while it ate my health bar.
Common Mistakes to Avoid — The Stuff That Got Me Killed (More Than Once)
I have a list of deaths that would make a funeral director blush. Let me save you the embarrassment.
- Ignoring the "Fear" mechanic. Some enemies (like the Dreadwalker) have an aura that builds a "Fear" meter. If the meter fills, your character drops their weapon and runs for 3 seconds — usually off a cliff or into another enemy group. The counter is Willpower consumables (crafted from Silkroot + Water). Pop one before engaging any boss with a purple aura. I lost a full set of rare gear because I fell off a bridge during a Fear proc.
- Over-encumberance is a death sentence. Your carry weight is 120 units by default. Exceed it and you move at a crawl. You can't dodge. You can't sprint. You can barely walk. I watched a friend get mauled by a Ravager (a mid-game miniboss) while trying to waddle away with too much scrap. The fix: always carry a Portable Workbench (it weighs 0.5 units and lets you break down junk anywhere). Dump your excess materials into scrap before you head back. Don't hoard. The game punishes hoarding harder than anything.
- Using the wrong damage type. Enemies in the Blighted Marsh have a 40% resistance to Kinetic damage (bullets). But they take 30% bonus damage from Acid weapons. If you're running pure ballistic in that zone, you're doing 40% less damage than you could be. Check the bestiary (it's in the menu, I promise) to see what each enemy is weak to. I spent two hours thinking the Marsh was "hard" when I was just using the wrong ammo.
- Not saving your "Buddy Beacon." You get one Buddy Beacon per playthrough — a one-time revive item. I used mine to pick up a random piece of junk that fell into a ravine. Don't do that. Save it for the final boss or the Desert Colossus encounter. You'll know when you need it. If you use it on anything less than a boss, you're wasting it.
- Treating the story quests as optional. The main quest gives you Blueprint Fragments that unlock weapon tiers. Side quests give you consumables and lore. If you ignore the main story, your weapons will be stuck at Tier 2 while enemies scale to Tier 4. I did a "completionist" run where I did all side content first. By the time I hit the main story, my SMG tickled enemies while they two-shot me. I had to restart. Do the main quest until you unlock Tier 4 crafting, then explore.
Oh, and one more: never trust a glowing chest in a dark room. It's either a trap or a mimic. Mimics in this game hit for 90 damage per swing and have a grab attack that does instant death if you're below 50% HP. Always shoot the chest from range before opening it. I learned that one after my fourth death. The fifth was stubbornness.
FAQ — The Questions I See on Every Forum
Q: Should I play solo or with friends?
A: Solo is harder but more rewarding. The difficulty scales with player count, so a party of three makes enemies have 180% health and 150% damage. The loot also splits. If you're playing with friends, coordinate your loadouts — one person runs a Flamethrower for crowd control, another runs a sniper for elites, and the third runs a shotgun for stagger. I did a duo run where we both ran rifles and got overwhelmed by adds constantly. Never again.
Q: Is there a "best" starting class?
A: There's no class system, but the Survivalist starting perk (gives you +20% more resources when looting) is the strongest by far. The "Fighter" perk gives you +10% melee damage, but melee is risky and most bosses have AoE attacks that punish you for standing close. Take Survivalist. It makes the grind much smoother. This mechanic is similar to the resource loops in Valheim — you want to scale your materials faster than your gear degrades.
Q: What's the best weapon in the game?
A: It depends on your stage. Early game? Titan Sword (mentioned earlier). Mid game? The Whisper-9 SMG with a Corrosive Rounds mod (deals 15% of weapon damage as Acid DoT over 5 seconds). Late game? The Fury Cannon (a minigun that fires explosive rounds, found in the Lost Arsenal dungeon). But the Fury Cannon consumes ammo like it's water in a desert, so you need a dedicated farming route. If you want to min-max, check out our Remnant 2 build guide — the philosophy of weapon synergy carries over.
Q: How do I respec my skill points?
A: You can't respec at all until you beat the third major boss. After that, the Memory Shrine appears in the hub area, and it costs 500 Scrap per point. Don't blow your points on random upgrades early. I had a friend put 3 points into "Increased Reload Speed" before realizing it only affected heavy weapons. Read each skill description carefully.
Q: The game says it has "perma-death" in hard mode — should I play that?
A: No. Not for your first run. Hard mode disables manual saves and any death costs you your equipped gear. I tried it once, died to a fall damage while exploring, lost my best gun, and alt-F4'd. Play on Normal. The game is hard enough without ironman rules. Save hard mode for when you've beaten the game twice and hate yourself.
Sign in to post a comment.
Sign in with GitHub to join the discussion.
💬 Comments
What players are saying:
Finally, a guide that admits the second boss is bullshit. The "break the left leg" tip saved me after 12 attempts. Also, the animation cancel trick for reloads works — I thought my game was bugged before reading this. Good stuff.
I disagree with the Titan Sword rush. I went spear and the reach helped more against the Bone Lord. But your point about the Flamethrower vs Swarm Mother is 100% spot on. Cleared that boss in one attempt after swapping loadouts. Wish I'd found the Quality Hammer tip earlier though.
I rage quit twice before finding this. The "taunt and tickle" loop on the Bone Lord is genius — I was trying to DPS race it like it was a Souls boss. And yeah, the inventory management section is dead on. I've died more times to being over-encumbered than to actual enemies. Get out of my head, author.