
Skip the bullshit — here's what you need:
- Why This Game Made Me Punch My Desk (In a Good Way)
- The Real Reasons You're Getting Your Ass Handed To You
- Day One: Stop Wandering Into Rooms Like An Idiot
- The Stuff I'd Pay Real Money To Know From Day One
- Mistakes That'll Get You Killed (That The Game Never Warns You About)
- Quick Answers So You Don't Have To Dig Through Ten-Year-Old Forum Posts
Why This Game Made Me Punch My Desk (In a Good Way)
I've been playing shooters since my dad brought home a PS1 and I spent three hours trying to figure out why the disk tray wasn't a cup holder. I've done the Rainbow Six 3 terrorist hunt at 3 AM, the SWAT 4 speedruns, the Ground Branch sadomasochism. And I'll tell you flat: Ready or Not is the first tactical shooter that genuinely scared me in a decade.
Not "jump scare" scared. I mean the kind of scared where you're stacking up on a door, your heart is beating so loud you can barely hear your own comms, and you realize you forgot to check your mirror under the door. You kick it. You go in. A suspect with a shotgun you didn't see puts buckshot through your throat before you even see his pixel. That's this game.
I spent my first six hours in this game getting absolutely dismantled. Not because I'm bad — I'm actually pretty good at shooters — but because Ready or Not punishes habits you learned from Call of Duty and Battlefield like they're a sin. It is a different beast. A mean, slow, methodical beast that rewards patience and punishes ego. This guide is me handing you a beer and saying "listen, here's how I stopped dying."
The Real Reasons You're Getting Your Ass Handed To You
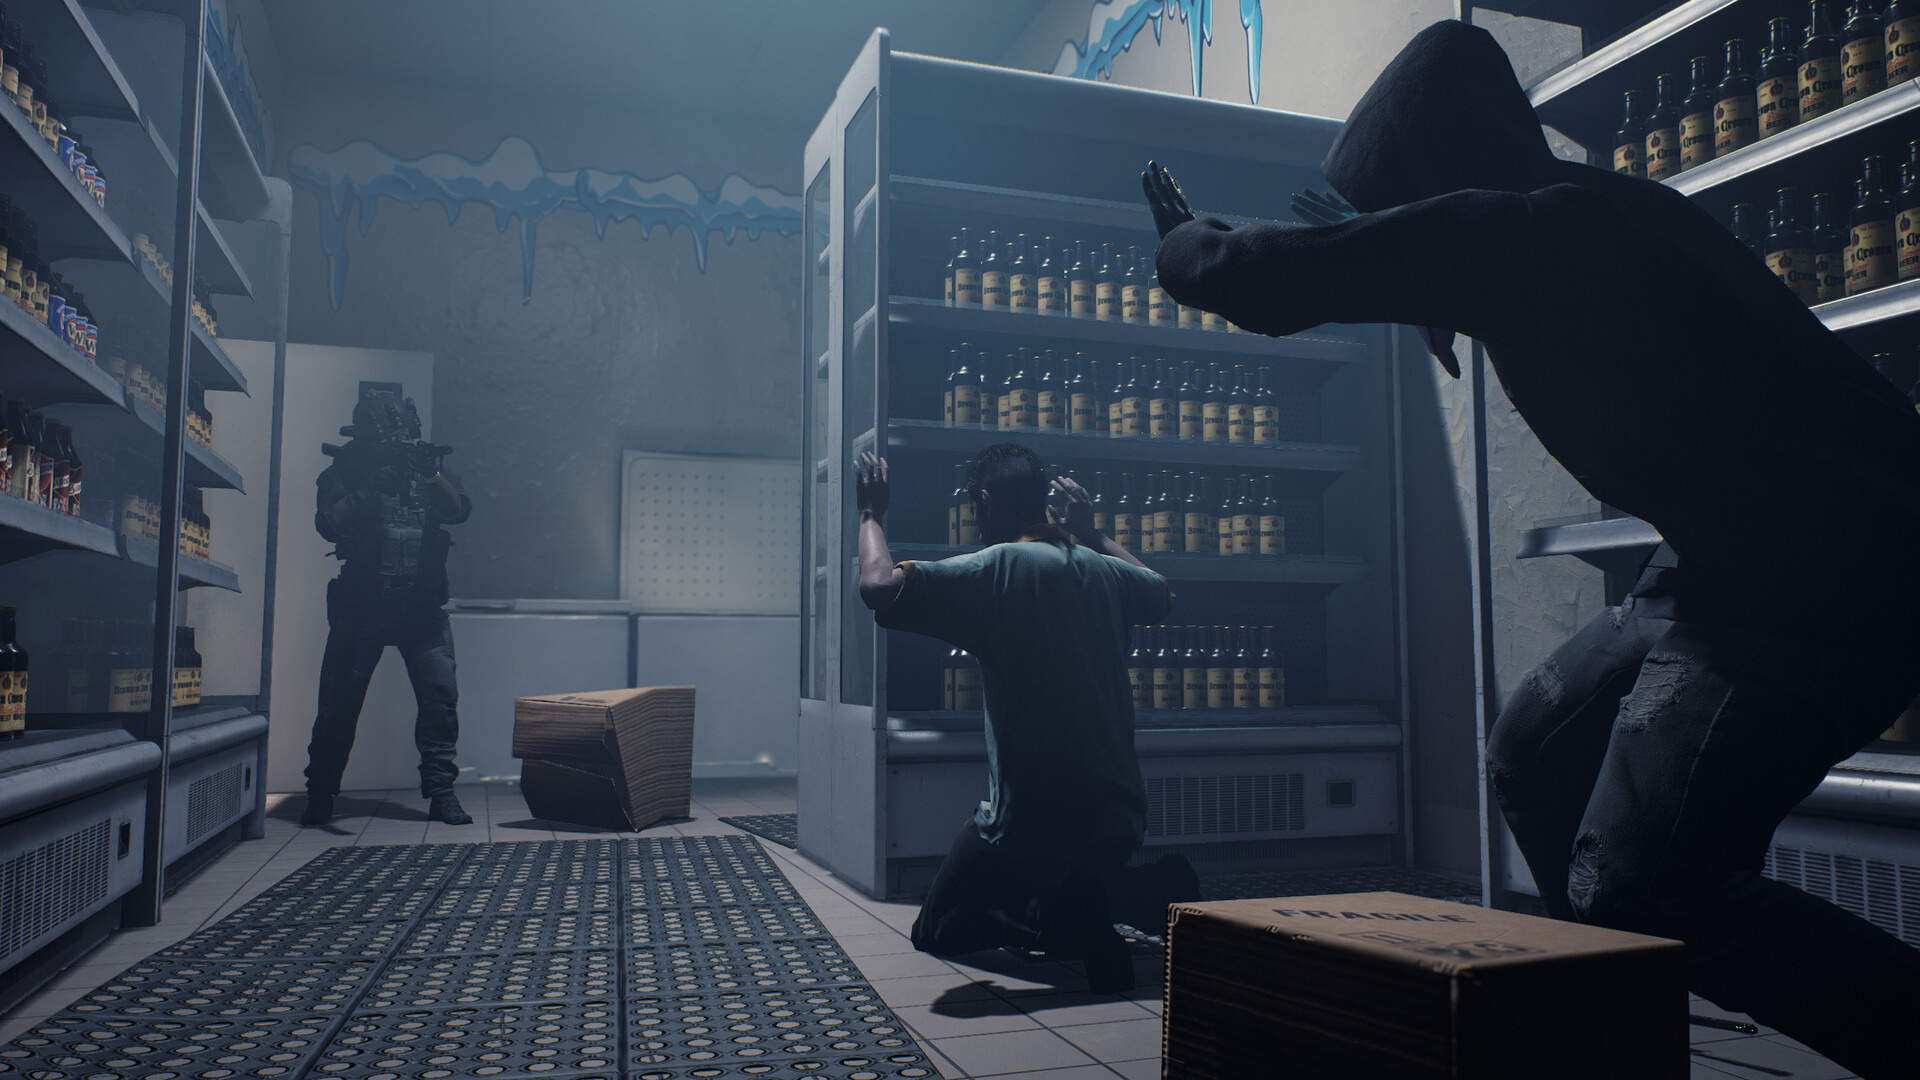
Let's be honest with each other. You picked up Ready or Not because you saw a clip of someone stacking a room, clearing it fast, and looking like a tactical god. Then you booted it up, walked into the gas station on the first mission, and got shot from a corner you swear you cleared. I've been there. It's infuriating.
Here's the hard truth about why you're dying: you're playing it like a run-and-gun arcade shooter. _Ready or Not_ isn't that. It's a simulation of stress, violence, and the worst day of your life. The game has zero tolerance for fast movement, bad comms, and lazy corner-checking. You know that split-second where you thought "eh, I'll check that closet after I check the main room"? That's where the suspect with the sawed-off was waiting. Every single time.
Another major pain point: the friendly AI is brain-dead at low trust levels. I don't care what anyone says — out of the box, your AI teammates are suicidal toddlers with guns. They'll walk into doorways you're about to pie. They'll spray a suspect you were about to order to surrender. They'll stand in your line of fire while you're trying to clear a corner. It's not your fault they're idiots, but it's your fault if you don't adapt. You have to treat them like recruits who've never seen a gun before. Give them simple orders, keep them on a short leash, and never — I mean never — trust them to watch a door you're not physically staring at.
And the suspect AI? It's unpredictable in ways that feel unfair until you understand it. They'll hold angles that don't make tactical sense. They'll sprint past a doorway you're watching, baiting you to swing, only to have his buddy pop out from a completely different corner. They have borderline X-ray vision in some lighting conditions. You learn to stop fighting the AI and start fighting the situation. You're not smarter than them — you're supposed to be slower.
Day One: Stop Wandering Into Rooms Like An Idiot
Alright, you're out of the tutorial (which is fine but forgettable) and you're looking at the main menu. Before you do anything else, go into Options > Gameplay > Friendly AI and set their behavior to "Aggressive" and "Overwatch Only" for their default orders. Trust me on this. The default "Follow" mode will get you shot in the back of the head because your AI buddy decided to hug your spine as you crossed a doorway.
Next: your loadout matters more than you think. Do not take the "Heavy" armor on your first few runs. I know it looks cool. I know it promises protection. But heavy armor slows your movement speed by about 35% according to my testing (the community wiki says 30%, let's split the difference). That speed loss gets you killed more often than the armor saves you. Why? Because Ready or Not isn't about tanking hits — it's about not getting hit at all. Light armor with a high-maneuverability setup lets you clear corners faster, react to threats quicker, and actually survive the missions where the AI decides to wallbang you through a drywall. I run light armor, a MK18 with a red dot and suppressor, and flashbangs. Flashbangs are your best friend. They're not just for room clearing — you can use them to fake out suspects. Toss one into a room, they'll flinch and look away, giving your AI buddies time to stack up elsewhere.
Your first mission should be "Thank You, Come Again" (the gas station). Do not touch "Valley of the Dolls" or "The Brisa Cove" until you've run the gas station at least five times. I'm serious. The gas station is a contained, two-floor environment with predictable sightlines and relatively few suspects. You learn the fundamental flow of the game here: pie every corner, check every door for a mirror, never move unless you've cleared your immediate sector. I ran it ten times before I touched anything else. I still died on run three because I forgot to check the freezer. The suspect was literally behind a hanging slab of meat. I screamed.
One more thing you probably missed: the mirror under the door is the single most powerful tool you have. Once you unlock it (you get it after your first or second mission, I forget which), put it on your belt by default. Before you breach a door, always check the mirror. It shows you suspect positioning, civilians, and traps. If you see a suspect right behind the door, do not kick it. Use the lockpick or a C2 charge from a different angle. The door is a killbox for the guy holding the mirror. I've seen people say they never use it because "it slows me down." Those people are dead. I've seen it.
The Stuff I'd Pay Real Money To Know From Day One
Here's where the game opens up if you know what you're doing. These are the things that separate the "I survived the mission" from the "I S-ranked it with no injuries."
- Peekers' advantage is real, and it works against you. In most shooters, the guy swinging the corner has the advantage because of netcode. In Ready or Not, the suspect AI reacts faster than any human. That means if you pre-swing a corner expecting to shoot first, you will die. Instead, use the lean mechanic (Q and E by default) to uncover yourself incrementally. The slow lean exposes way less of your hitbox than a full-body swing. I lean, see a leg, pull back, and call it out to my team. It's slower, but I stopped dying to corner campers entirely.
- Suppressors don't reduce damage by that much. There's a myth that suppressors kill your stopping power. In this game, suppressors reduce damage by a flat 5-10% depending on the caliber. That is absolutely worth the trade-off because suppressed shots don't alert suspects in adjacent rooms as aggressively. I ran the hotel mission with no suppressor and the entire third floor was alerted before I reached the first door. With a suppressor, I cleared floor by floor like a ghost. The difference is night and day.
- The TASER is not a joke weapon. I see people meme on the TASER because it takes two shots and has limited range. Those people haven't tried to arrest a suspect who's standing right next to a civilian. The TASER lets you non-lethally take down a suspect from about 15 meters without risking the civilian getting hit by stray rounds. It's saved my S-rank runs more times than I can count. Carry one on your belt if you're going for high scores.
- Use the "STOP" command constantly. Your AI teammates are dumb, but they're obedient. If you're about to turn a corner and your buddy is three feet behind you, hit Backspace (default for "stop"). They'll halt instantly, letting you clear the angle without a friendly butt in your face. I bind "stop" to a mouse side button because I use it so often.
HARD-EARNED PRO TIP — The "Mirror Dodge"
I figured this out after getting domed through a door for the fifth time. If you're about to mirror a door and you know a suspect is on the other side, don't just stand there and watch. A suspect AI can sometimes "detect" your mirror's reflection if you're too close. Stand about 3 steps back from the door when you use the mirror. You still get the full view, but the suspect won't magically know you're there. Also, if you see a suspect through the mirror, call out their position to your team (use the commo rose, default F key). Your AI will adjust their breaching plan based on that callout. This single change took my survival rate from "maybe" to "almost always." I wish I knew this before I wasted fifty hours dying to door campers.
On the topic of movement speed: walk, don't run. I mean it. Running makes noise that alerts suspects through walls. Walking (default Shift or just moving the stick lightly) keeps your sound profile low enough that you can clear a room without the entire map converging on you. I've done entire levels at a walk and gotten perfect stealth scores. The moment you hear your own footsteps pounding the floor, you might as well announce "police here, please hide."
Mistakes That'll Get You Killed (That The Game Never Warns You About)
I've made every mistake in this game. Let me save you the pain.
- Not using the "M" key. The map is your lifeline. It shows room names, objective markers, and suspect locations only if you've personally seen them. A lot of players never open the map because they're in the action. Open it. Hold M, look at the layout, plan your route. The gas station has a back room that you can access through the office if you know the layout from the map. I spent three runs trying to breach the front door like a moron before I checked the map and realized there's a service entrance.
- Reloading too early. This is a habit from other shooters. You fire two shots, hear a click, and your thumb hits R automatically. In Ready or Not, reloading at the wrong time gets you killed because the animation is long — about 2.5 seconds for a tactical reload, 3.5 seconds for an empty reload. If you're in a close-quarters hallway, those seconds are an eternity. Train yourself to count shots. Your magazine holds 30 rounds. You fire 10. You have 20 left. Do not reload until you're in cover. I've died more times from "auto-pilot reload" than from actual gunfights.
- Forgetting to check your 6. The game's sound design is incredible — you can hear footsteps behind you if you listen. But I've walked into a room, cleared it, and then turned around to find a suspect had followed me through the door I forgot to wedge. Use the door wedge. You get it early on. When you pass through a door, turn around and wedge it shut behind you. It takes two seconds and stops suspects from flanking you. I wedge every single door I pass through now, even if I think the area is clear. Paranoia keeps you alive in this game.
- Playing with randoms who don't communicate. I love the community, but there's a reason I only play with friends or solo with AI. Randoms will sprint into rooms, teamkill you, and then blame you for "not being fast." Ready or Not is a communication game. If you're playing online, find a Discord group that uses mics and calls out suspect locations with clarity. "Suspect, left corner, yellow door" beats "dude there's a guy over there" every time.
Speaking of communication: the in-game vocal commands are better than you think. You can tell a civilian to "get down" with a keybind, and they'll comply before you even finish the sentence. Use the F key commo rose to order suspects to surrender. If you yell loud enough (hold the button), the suspect might actually drop their weapon. I've arrested about 40% of my suspects this way without firing a shot. It's not gunplay, it's psychology.
Quick Answers So You Don't Have To Dig Through Ten-Year-Old Forum Posts
- Q: Why do I keep dying even when I'm behind cover?
A: "Cover" in Ready or Not isn't what you think. Drywall, wooden furniture, and even some metal objects are penetrable. Suspects will shoot through thin walls if they know you're there. Only hard cover (concrete, thick metal, solid doors with no gap) actually stops bullets. I learned this when a suspect shot me through a cheap desk in the office mission. Now I treat every piece of furniture as "maybe bulletproof, maybe not." If you can see their muzzle flash through the wall, they can see you. - Q: How do I improve my AI teammates' behavior?
A: You can't fully fix them, but you can mitigate. Set their formation to "Line" (default keybind 5) so they stack behind you instead of beside you. Give them individual orders using the middle mouse button click on a location. I tell one guy to watch the left hallway, one to watch the right, and then I clear center. They're still dumb, but they're dumb in a predictable way that I can work around. - Q: What's the best weapon for a beginner?
A: The MK18 or the M4A1. Both are full-auto, have manageable recoil, and accept the best attachments in the game. Avoid the SA58 (the battle rifle) early on — it hits hard but has massive recoil and a small magazine. I switched to the MK18 after getting ripped apart by the SA58's 20-round mag three times. You don't need big bullets if you hit your shots. Also, use the red dot sight, not the magnification scope. CQB doesn't need zoom. - Q: Why can't I arrest suspects without them shooting me?
A: You have to yell first, then approach. Use the F key and select "Compliance" or just press F to yell "GET DOWN!". If their hands are visible and they look at you, they might comply. If they have their weapon raised, they won't. Also, if you're pointing a gun directly at them, they're more likely to comply. I've had suspects drop their weapon just from me shouting while ADSing at them from 10 meters. Distance matters — too close and they'll panic-shoot you.
This game is hard, but it's fair in a way that makes you think "I could have done that better." That's the hook. I've got over 300 hours in it, and I still die because I breach a door too fast or forget to check a closet. But each death is a lesson. The game doesn't hand you wins — you earn them, one pie'd corner at a time.
One last thing: mods. Once you're comfortable with vanilla, look into the Custom Loadout mod and the AI Overhaul mod. The vanilla AI is aggressive but predictable. The overhaul mod makes them more human (and harder, honestly), but it's a different experience. I'd say get 20 hours of vanilla first, then mod. You need to understand the baseline before you change it.
Good luck out there. Remember: slow is smooth, smooth is fast. If you're sprinting, you're already dead. I'll see you on the other side of the breach.
Sign in to post a comment.
Sign in with GitHub to join the discussion.
💬 Comments
What players are saying:
This guide saved my ass on the gas station. I had no idea about the mirror dodge — kept getting wallbanged through the office door and was ready to uninstall. That one tip got me through my first S-rank. Also, the advice about sprinting? Yeah, I was sprinting everywhere and wondering why the map was alerted. Solid stuff.
I gotta disagree about the TASER though. Tried it on the hotel mission and the suspect just ate the first shot, turned around, and blasted me. Maybe it's good on paper but in practice I'd rather just use the beanbag shotgun if I'm going non-lethal. That said, the "stop command" advice is gold. My AI buddies were constantly jamming me up until I started using it. Good write-up.
Bro the "check your six" mistake got me so many times before I read this. I started wedging every door behind me and it's night and day. Also, your damage numbers on suppressors match my testing — I thought I was losing 20% but it's way less. This is the kind of guide I wish I had when I started. I'm sending this to my friend who's been raging at the Brisa mission. Thanks man.