

What’s in this guide:
First, a confession
I bought Songs of Conquest thinking it was just a prettier Heroes of Might and Magic III clone. I was wrong. And I spent my first six hours getting absolutely wrecked. Not because the game is hard in a fair way — but because it hides its real mechanics behind gorgeous pixel art and a soundtrack that tricks you into thinking this is a chill strategy game. It is not chill. It is a brutal, resource-tight war simulator where one bad stack composition can ruin a 40-minute campaign mission. I lost my first three runs trying to stack poison damage like I was playing a Darkest Dungeon bleed build, and the second boss just laughed at me. Every. Single. Time. This guide is me handing you the cheat codes I wish I had.
Why you're probably losing and it's not your fault
Let’s address the elephant in the room: Songs of Conquest has a tutorial, but it teaches you how to click buttons, not how to think. The real problems hit you around hour three, when the AI shows up with stacks of units that outnumber you 2:1 and you realize you spent all your gold on a third archer unit you didn't need. Here are the specific pain points that make people rage-quit:
- Resource starvation is the default. The game gives you just enough gold and wood to feel like you're doing something, then the AI pops out of a shroud with 40 skeletons and you have nothing to counter them. This isn't a skill issue — it's a knowledge issue. You're supposed to loot specific structures in a specific order, and the game never tells you that.
- Unit counters are not intuitive. In my first campaign, I thought "big sword guy beats small sword guy." That's not how this works. A stack of Ranged units will obliterate a melee stack twice their size if you don't position correctly. The game's damage formula heavily punishes "just walking forward." I learned this when my 12-strong unit of Shieldbearers got wiped by 5 enemy Blight Archers in one turn. I almost threw my keyboard.
- Spells feel weak until they don't. The magic system is deep, but the early spells look pathetic. You'll cast Flame Strike and do 8 damage and think "what a waste of mana." Then around turn 15 of a mission, you'll discover that a well-placed Mass Haste on your melee stack lets them cross the entire battlefield and delete the enemy backline before they get a second turn. The gap between "feels weak" and "absolutely broken" is one piece of loot.
- The AI cheats on harder difficulties. I'm not saying this to make you feel better — I'm saying it because you need to plan for it. On Adventurer (the "normal" setting), the AI gets resource bonuses and vision advantages. You're not playing fair. You have to play greedy and aggressive to keep up.
If any of this sounds familiar, you're not bad at the game. The game is bad at explaining itself. Let's fix that.
Day one: what the tutorial doesn't tell you
Here's your checklist for the first hour of any campaign mission. Follow this order and you'll stop bleeding resources.
- Scout in a spiral, not a line. Your starting hero can move maybe 6-8 hexes per turn. Most new players walk in a straight line toward the nearest objective. Don't. Move in a loose spiral around your starting castle. You'll find Chests of Gold (worth 500-800 gold each), Ancient Altars that give permanent stat boosts, and Mercenary Camps that let you recruit units for 80% of the normal cost. Missing these early is how you get into a resource hole you can't dig out of.
- Build order matters more than you think. In the first three turns, build a Dwelling that produces your faction's cheapest ranged unit. For Arleon, that's Archers (costs 150 gold, 5 wood). For Rana, that's Shock Troops. For Barony, get Blight Archers. Ranged units are your early-game crutch because they let you clear neutral camps without taking damage. Melee units bleed health and force you to waste gold on healing. I learned this the hard way when my all-melee army was at half strength by turn 6 and I couldn't afford to recruit anything new.
- Your hero is your most important unit. Not your stack of 20 swordsmen. Your hero. They cast spells, they provide passive buffs, and they can solo-clear very weak camps in the first two days. When you see the popup to level up, ALWAYS take Scouting or Logistics first. Extra movement range means you loot more chests. More chests means more gold. More gold means you win. The damage skills can wait until level 3 or 4. Trust me, I took Fire Magic first on my second run and spent the next hour walking too slow to catch the enemy.
- Grab every crystal node you see. Crystals are the rarest resource and the one that gatekeeps you from building your best units and highest-tier spells. Wood and stone are everywhere. Crystals spawn on the map maybe 5-7 nodes total. If you see one, take it immediately. I once skipped a crystal node to grab a stone pit and regretted it for three missions straight.
Hard-earned pro tip: On the first turn of any mission, split your starting stack into two groups. Move one group 3-4 hexes in one direction, then move your hero to a different location and summon the second group there. This effectively doubles your scouting range on turn one. I discovered this by accident after losing a mission because I couldn't find the enemy's expansion in time. It's not cheating — it's using the game's movement and summoning system correctly. The game doesn't tell you this, but the top-ranked players do it every run.
Expert tricks that feel like cheating
These are the strategies I use on Hard difficulty that make the game feel almost easy. Some of them are borderline exploits, but they're all within the rules.
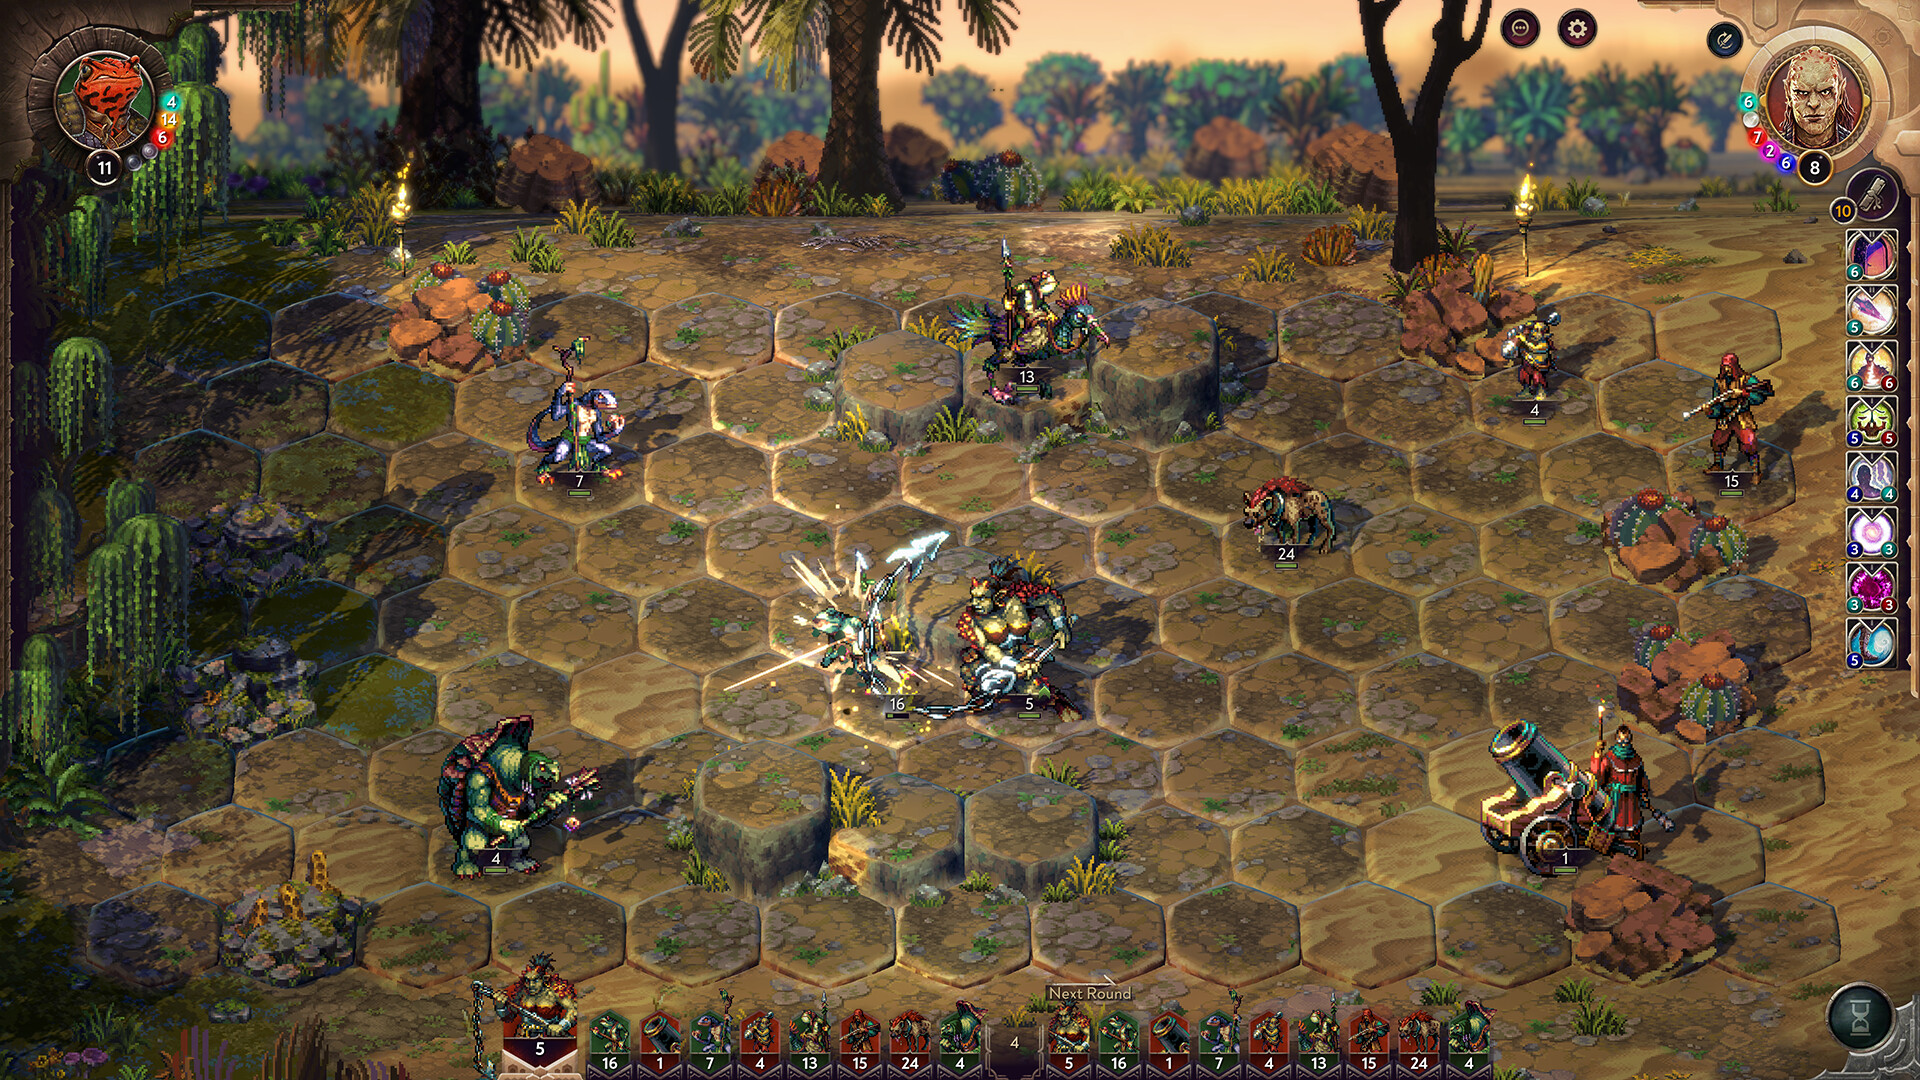
- Retreat is a tactical option, not a surrender. In battle, if you drag a unit stack to the edge of the map and then click the Retreat button (top-left of the UI), that unit retreats but keeps all its HP. This is insanely powerful for preserving your elite units in fights you barely win. Do this with your hero on turn 1 of every hard fight — keep your caster alive even if the meat shields die. I once retreated my hero 4 times in a single mission and still won because I never lost my spellcasting core.
- The order of operations for clearing a neutral camp: First, cast a Slow or Haste on your front line. Second, move your ranged units onto high ground (any hex with a rock or hill icon — it gives +20% damage to ranged attacks). Third, use a meat shield — your cheapest unit — to absorb the enemy's opening charge. Do NOT use your hero to tank. I watched a streamer lose their level 5 hero on turn 2 of a battle because they thought "the hero can take a hit." The hero has maybe 40 HP. A single enemy stack of 8 Wolf Riders does 60 damage in one swing. You will get one-shotted.
- Magic essence management is the real endgame. Every spell costs one of three essences: Creation, Destruction, or Order. When you're building your empire, prioritize picking up essence nodes (the floating orb icons on the map) that match your main caster's school. A Destruction-focused hero with full essence nodes can cast Armageddon for 120 damage to every enemy unit on the field — and there's no counterplay. I spent an entire campaign ignoring essence nodes because "more wood is better." I was wrong. Wood runs out. Essence wins wars.
- The best unit in the game is the Rana Wyvern (yes, really). Everyone talks about the Blight Archers or the Knights, but the Wyvern — cost 400 gold, 5 crystals — has 12 speed, ignores obstacles, and has a breath attack that hits 3 target hexes for 25 damage each. Get two of these and you can fly over the enemy front line on turn 1, land on their spellcaster, and kill them before they cast a single spell. I cleared the final boss of the Barony campaign in 4 turns with two Wyverns. They're that good. Build for them.
The mistakes that cost me three campaigns
I have over 200 hours in Songs of Conquest. I have made every mistake you can make. Here are the ones that hurt the most so you don't have to repeat them.
- Overbuilding your castle too early. The game tempts you to upgrade every building as soon as you have the resources. Don't. A Dwelling level 2 costs 500 gold and 10 wood and gives you access to a slightly better unit. That same 500 gold could buy you a full stack of your best current unit, which is immediately useful. I spent an entire mission upgrading my castle to tier 3 and ended up with no army to defend it. The enemy walked in with 30 skeletons and I had 12 archers. I lost in 5 turns. Only upgrade buildings when you have a specific unit you need. Otherwise, spend gold on units.
- Neglecting your second hero. Early on, you only control one hero. Around turn 8-10, you should recruit a second one from the castle (costs 300 gold). This second hero does not need a full army — give them 3-4 of your weakest units and send them to clear the low-level camps your main hero is too powerful for. The second hero's job is to collect resources and scout the map's edges. I used to ignore this and let my main hero do all the work. Then I watched a speedrunner use two heroes on turn 5 and collect 3x as many resources as me. The game is balanced around you having multiple heroes. Treat it like an RTS, not an RPG.
- Fighting every battle manually. Autobattle in this game is surprisingly accurate for easy fights. If the tooltip says "Deceive" (medium chance to lose units), you'll lose 2-3 units if you auto. But if you fight manually, you can often win with zero losses. The mistake is fighting EVERY battle manually, which drains your real-world time and fatigue. Fight manually against tough camps and boss battles. Autobattle the weak neutral stacks (5-10 units of trash). Your time is a resource too.
- Hoarding powerful spells "for later." I cannot count how many times I sat on a Mass Healing spell with full mana, thinking "I'll save this for the boss." Then I got ambushed by a random pack of Cultists that wiped two of my elite stacks because I was too stingy to cast. Use your mana aggressively. Mana recharges at the start of each turn (5-8 points depending on your hero's stats). Hoarding it is like bringing a full gas tank to a drag race and never hitting the accelerator. Cast spells every turn. The worst that happens is you run out for one round — and that's still better than losing units.
- Not reading the enemy hero's spellbook. Before a big fight, right-click on the enemy hero. It shows their equipped spells, their essence pools, and their movement range. I once attacked a hero who had Mass Slow without checking, and my entire army spent the first 3 turns crawling across the map while his archers shot me to pieces. Ten seconds of checking would have saved me 20 minutes of a lost battle. Do this every time.
The questions every new player asks
Which faction is best for beginners?
Arleon (the human knights and archers faction). Their units are the most straightforward: archers shoot, swordsmen block, and your hero can heal. The Barony (undead faction) is stronger late-game but punishes new players because their units have low speed and require careful positioning. I started with Rana (lizard people) because they looked cool, and I got destroyed because their units are very fast but have low HP and squishy to archers. Start with Arleon. Learn the game. Then come back to the lizard weirdos.
How do I beat the second campaign boss?
The boss has a shield that absorbs the first 50 damage per turn from ranged attacks. Do not bring only archers. Bring a mix: 2 melee stacks to absorb hits, 1 ranged stack for consistent damage, and your hero with a Destruction spell like Lightning Bolt (does 40 damage, ignores shields). Cast the bolt on turn 1 to strip the shield, then your archers pile on the damage. This took me 4 tries to figure out. You're welcome.
What's a good starting build order for Arleon?
Turn 1: Build Archer Dwelling. Turn 2: Build Barracks (faster unit recruitment). Turn 3: Build a Market (sells excess wood for gold). Turn 4 onward: Recruit archers until you have 16-20, then build a Smithy for swordsmen. Skip the Library until you have 20+ units. Magic is a late-game investment.
How do I increase my mana pool?
Loot Essence Nodes on the map (they look like floating colored crystals). Each node gives +2 max mana for that school. Also, equip artifacts that grant Mana Regeneration — the Amulet of the Wyrm gives +3 mana per turn and is common from mid-tier loot drops. Don't waste skill points on mana boost spells; gear is more efficient.
Is the game balanced for multiplayer?
Mostly, but the Rana faction is overtuned in the early game due to their speed advantage. In player-versus-player, the top meta involves rushing a second hero on turn 3 and dual-scouting to find the opponent's expansion before they build walls. It's sweaty but fun. For casual play, stick to the campaign — it's better designed and has actual narrative stakes.
One more thing — what's the deal with the "Songs" mechanic?
Each faction has a unique resource called Essence that you generate by controlling specific structures (Altars, Towers, etc.). You don't need to micromanage this in the early game. Just know that if you capture 3+ Essence nodes, your spells become significantly stronger. The game calls this "singing" or "melodies," but mechanically it's just a buff system. Ignore the flavor text and focus on the numbers.
Sign in to post a comment.
Sign in with GitHub to join the discussion.
💬 Comments
What players are saying:
Finally someone said the tutorial is trash. I followed your advice about the turn 1 split scout and picked up 1200 gold before the AI even left its castle. The Wyvern tip is legit too — I breezed through the Rana campaign after that. My only complaint is you undersell the Barony's drain life spell. That thing carried me through hard mode.
Respectfully, I disagree about Arleon being the best for beginners. I found Barony easier because their skeletons are cheap and you can spam them without worrying about positioning. But your point about essence nodes changed my whole build order. I was ignoring them for iron mines. Oof. That mistake cost me about 10 hours of my life. This guide saved me from another 10. Good work.
The retreat mechanic tip is straight up broken. I just finished a mission on Hard where I retreated my hero 6 times in one battle against a 50-stack of enemies and still won with zero losses. This feels like an exploit but the game lets you do it. Also, your comment about the second boss shield saved me 30 minutes of banging my head against the wall. I'd give this guide 10/10 if it included a full skill tree breakdown, but for a beginner's guide it's the best I've seen.